 ENG
ENG


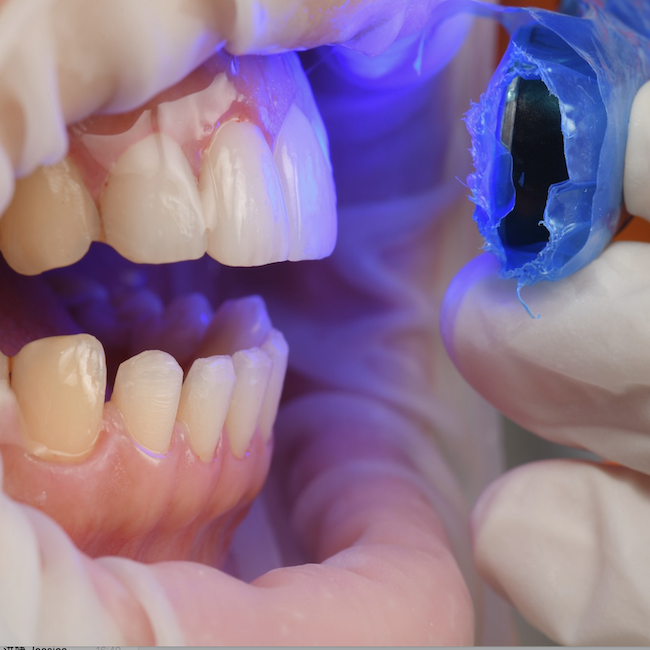
Table of Contents
With the development and application of digital dental technology and advanced restorative materials, it is possible to remove as little tooth tissue as possible when fabricating veneers, which not only satisfies esthetic requirements, but also provides healthy teeth. Today’s case of minimally invasive anterior veneer restorations comes from Dr. Sai Aom Kham, an experienced dentist from Myanmar. Dr. Sai Aom Kham founded the Grand Family Dentistry & Implant Center and dedicated himself to digital technology to help patients restore their smiles.

Fig 1: Dr. Sai Aom Kham
Case Profile
Gender of patient: Male
Age of patient: 28 years old
Chief complaint: The patient suffered from yellow teeth that stood apart and had made him dissatisfied with his smile for a long time.

Fig 2,3: The patient suffered from yellow teeth that stood apart and had made him dissatisfied with his smile for a long time
Treatment Plan


Fig 4, 5, 6: Intraoral view of patient’s initial condition
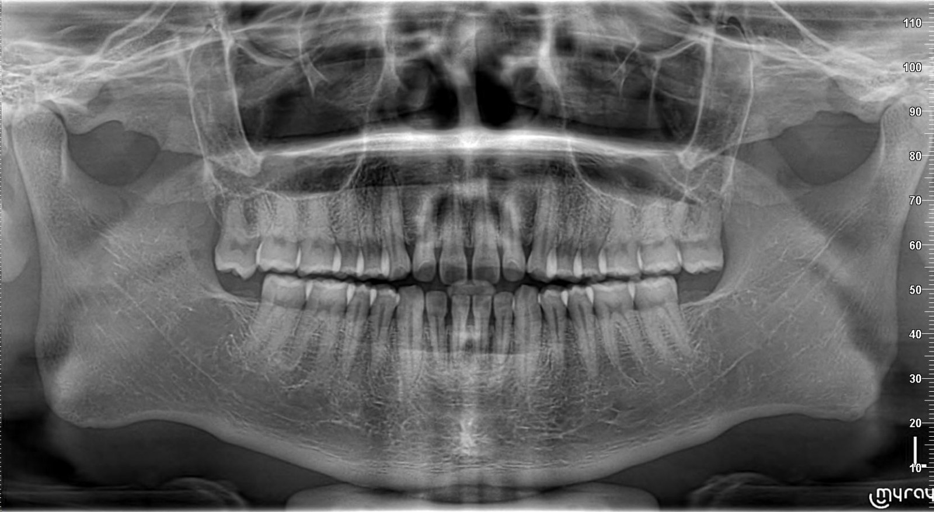
Fig 7: Extraoral radiograph of the patient (OPG view)
Among the many treatment options, the patient refused orthodontic treatment because he had to travel abroad. Therefore, the dentist opted for another treatment option, namely a minimally invasive veneer restorations in which 10 veneers were made in the upper jaw and 4 veneers in the lower jaw.
Treatment Process: Mock-up
To perform the minimally invasive tooth preparation, the dentist first printed the upper and lower jaw models with the AccuFab-L4D printer from SHINING 3D using DM12 resin.

Fig 8:The printing and curing process
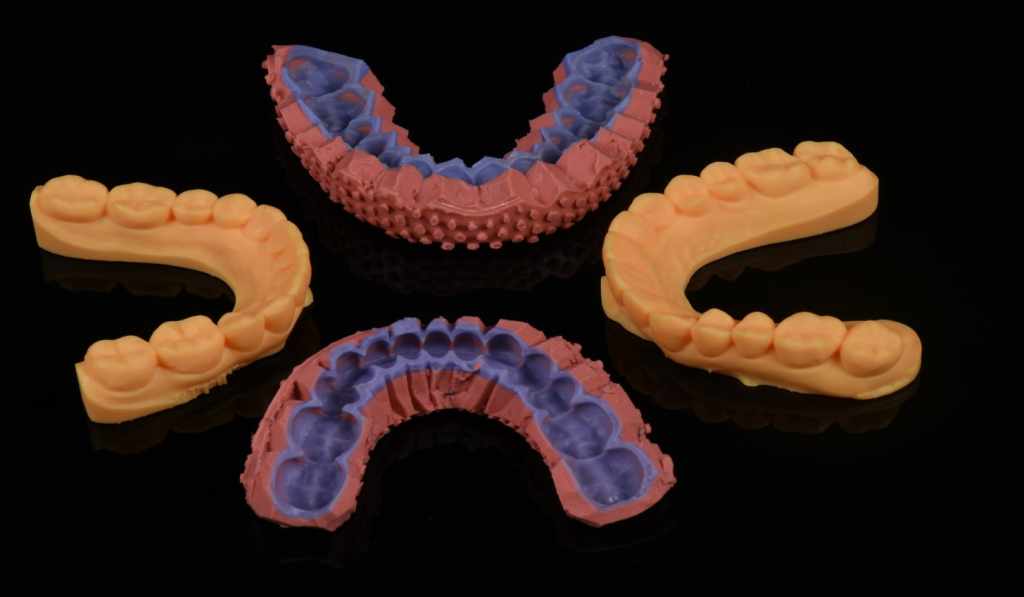
Fig 9: The model printed by AccuFab-L4D

Fig10:The mock-up can not only increase the patient’s motivation, but also enable minimally invasive veneer preparation of less than 1 mm.
Treatment Process: Teeth Preparation
After the patient was satisfied with the mock-up, the dentists began preparing the teeth by diode laser gingivectomy in the upper and lower anterior regions and removed the limited tooth tissue.

Fig 11: Veneer Preparation
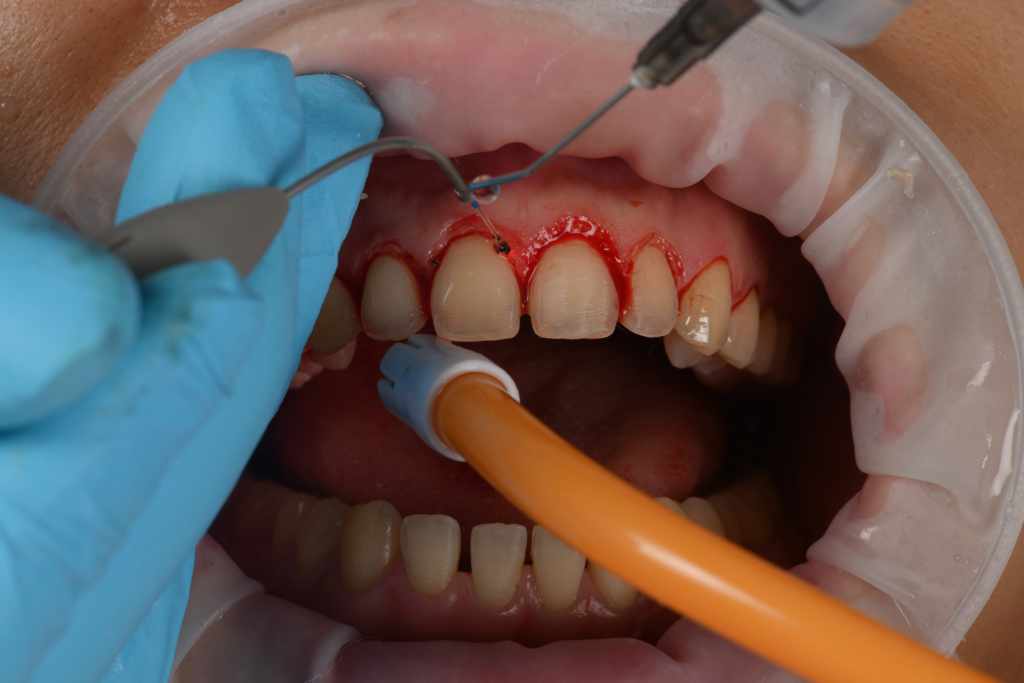
Fig12: Diode Laser Gingivectomy


Fig 13-15: After Laser gingivectomy, the front side, left side and right side.


Fig16-18: Final Polishing of veneer preparation
At this stage, the role of dental photography is very important, which can clearly show the unpolished surface of the teeth that cannot be detected by human eyes.


Fig 19-21: After minimally invasive veneer preparation
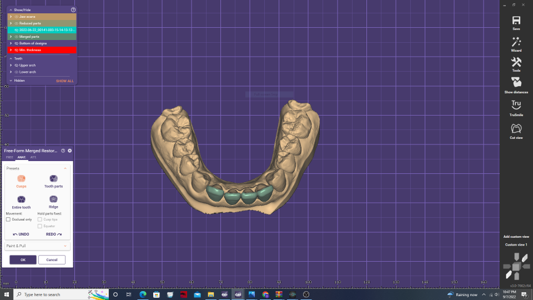
Treatment Process: Digital Impression with SHINING 3D’s Aoralscan 3
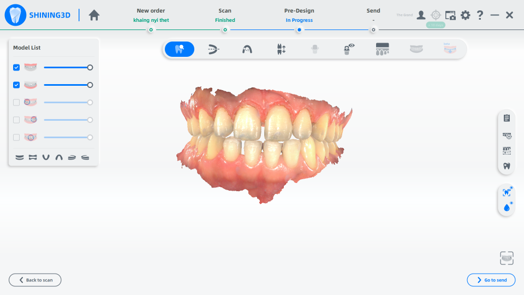
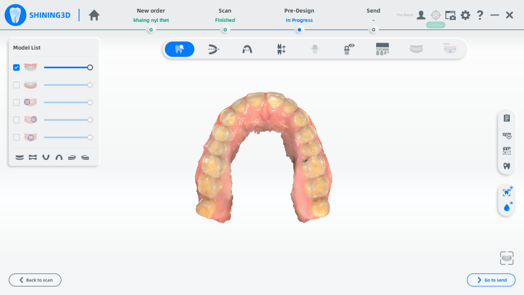
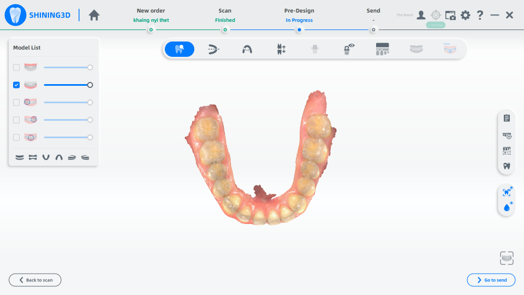
Fig 22-24: Complete intraoral scanning including the occlusion.
Treatment Process: Computer Aided Design (CAD)
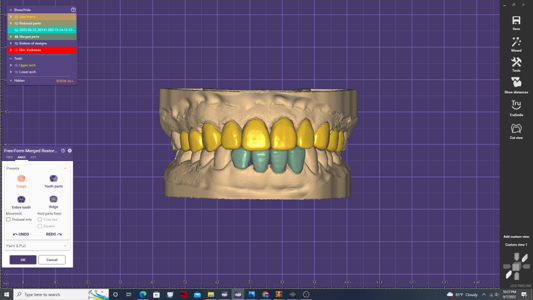

Then the data was imported into exocad, and the dentist designed 10 veneers in the upper jaw, 4 veneers in the lower jaw.
Treatment Process: Fixing Veneers


Fig 28, 29: Veneer try-in stage


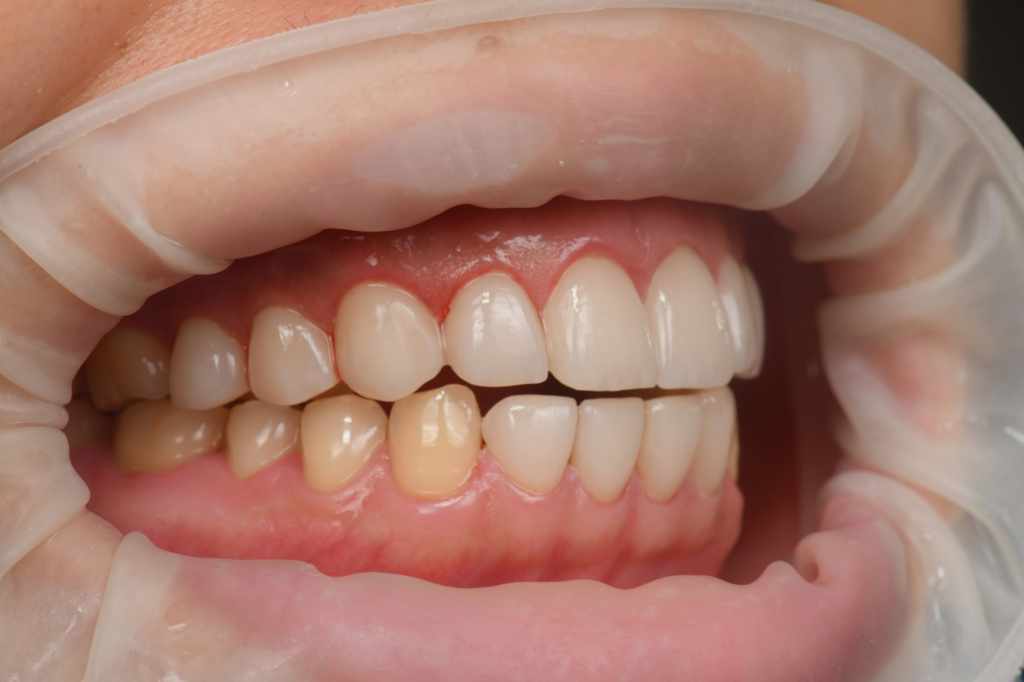
Fig 30- 32:After veneer final cementation.
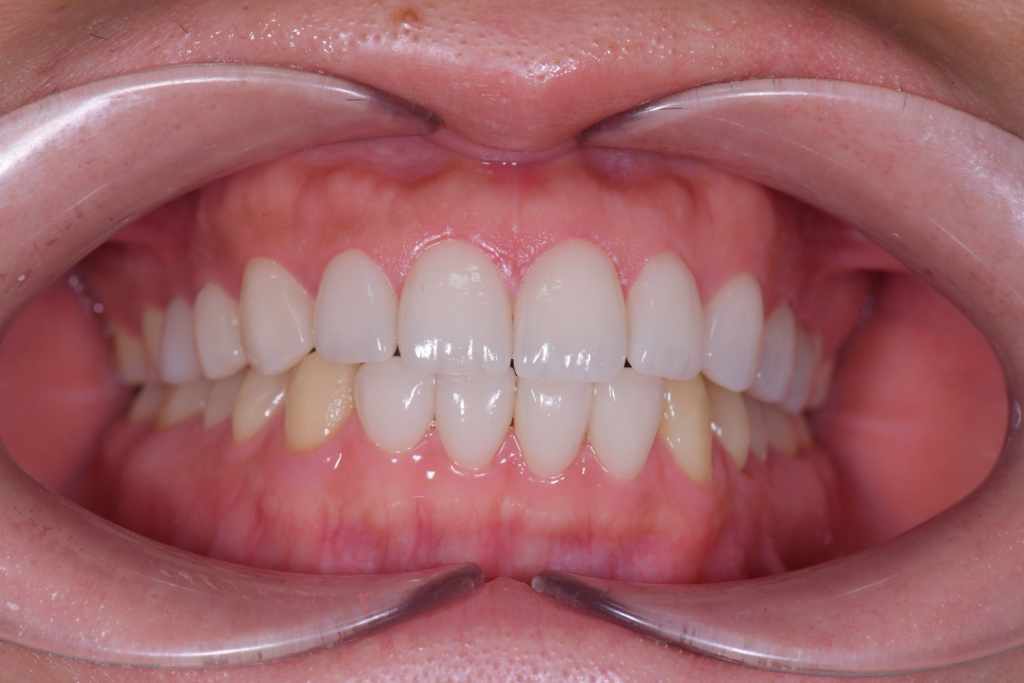

Fig 33,34: The difference before and after the whitening treatment.
Then a whitening treatment was performed for the rest of the patient’s teeth, Fig 33 and Fig 34 show the difference before and after the whitening treatment.


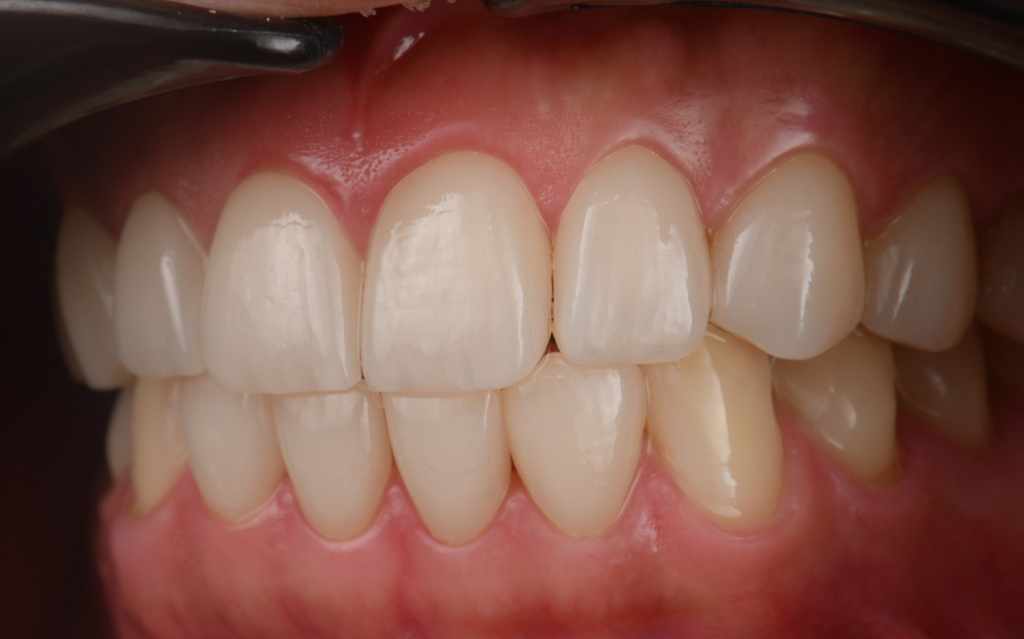
Fig35- 37: Follow-up after 2 weeks

Fig 38: Front View (Before and after treatment)

Fig 39: Intraoral anterior view (Before and after treatment)

Fig 40:Intraoral left side view (Before and after treatment)

Fig 41:Intraoral right side view (Before and after treatment)
The comments from Dr. Sai Aom Kham
For me, the power of digital dentistry is distilled into three main advantages: efficiency, experience, and expansion.
Regarding efficiency, the pandemic has reduced the number of treatments dental practices can perform per day. Therefore, the pursuit of efficiency has never been more important. Take intraoral scanners as an example; with this equipment, a dentist or trained nurse can take a digital impression of both arches within minutes. This also reduces chairtime and provides more comfort for patients. Digital scanning leaves a surgery needing the minimum amount of decontamination. It also enables the dental team to clean up faster and move to the next patient more swiftly.
When we consider the patient’s “experience”, digital dentistry again provides benefits in many ways. It gives patients a better insight into their treatment, as they can view digital scans of their teeth. This helps them better understand the clinical situation and treatment recommendations. And it can also build trust in you as their dentist and encourage treatment acceptance.
Once the dialog is opened, there are always further opportunities to suggest different options and expand treatment plans. All in order to give your patients the smile they want and are happy to share with the world through social media.
Digital impressions are the gateway to all kinds of digitally enabled treatments. Such as single-visit dentistry for single or multiple tooth restorations, clear aligners, and implants. They are all available and we can fully integrate them into a digital workflow making it more streamlined.