 ENG
ENG


The advancement of digital technology in the dental field brings a new experience to patients and dentists. Not only making the whole treatment process easier, but also significantly decreasing cost. Today’s case of full arch treatment with digital technology comes from Pawel Paszkiewicz from Poland, a professional dentist, specialising in orthodontics, aesthetics, and implantation. He has devoted himself to developing and creating advanced methods using digital dentistry technology to meet patients’ needs.
Case Profile
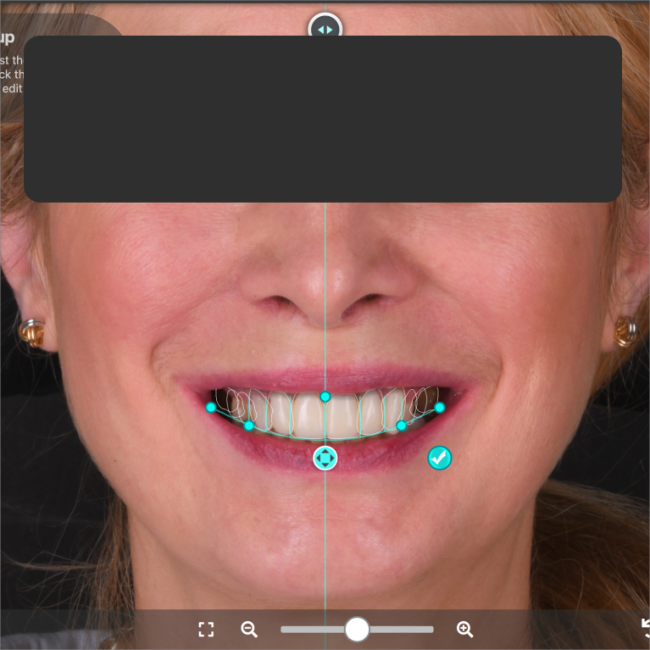
A young female came to Pawel Paszkiewicz, asking for help. The patient would like to recreate her smile by covering all teeth with restorations.
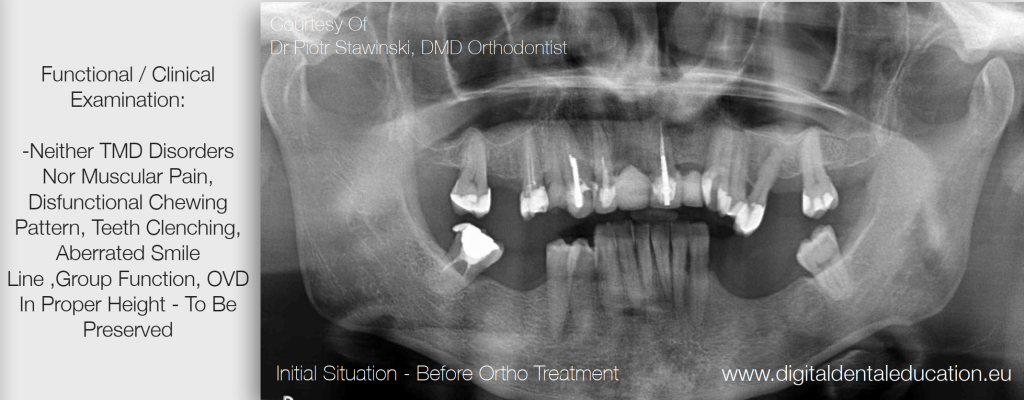
Fig 1: The initial diagnosis and panoramic radiograph
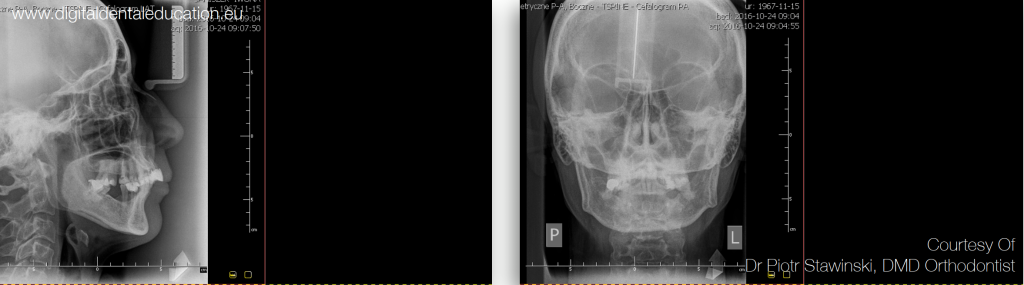
Fig 2: Cephalometric before ortho
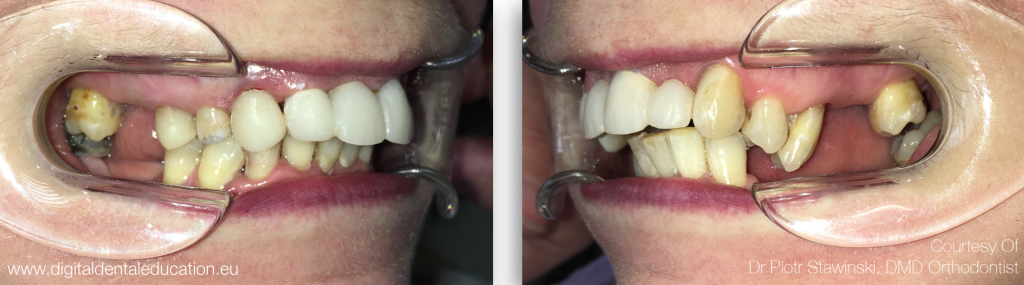
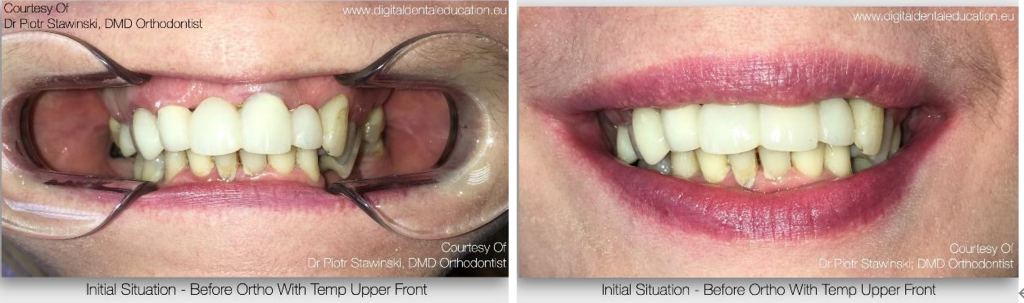
Fig 3,4: The initial situation before ortho treatment
Treatment Plan
This case happened during the Covid-19 pandemic, making her course of treatment difficult due to the patient living abroad, she had limited access to appointments. Financial woes forced the patient to divide her treatment and appointments over a long period of time.
The plan started with the lower jaw being treated first with orthodontics. The next step during the treatment is to carry out implant surgery in the posterior area to support ortho treatment. The third step is to carry out aesthetic implant restorations in the upper jaw. However, because of the financial situation faced by the patient, maxilla implantations were not done. Instead, we made crowns and bridges.
Since the target solution was to recreate the smile by covering all teeth with restorations, the dentist chose a brighter color, with the patient’s consent. With that in mind, the lower fronts will remain the same color, they are mismatched during this part of the treatment and will be altered as soon as the patient has the financial opportunity to correct them.
Treatment Process – Orthodontics and Implantation in Lower Jaw
At first, orthodontic treatment was performed to intrude upper lateral teeth as well as lower front teeth to improve the aesthetic and function of the patient. During the treatment, implants were placed in the mandible with temporary PMMA crowns to support the ortho treatment.

Fig 5: Orthodontic intrusion of lower fronts
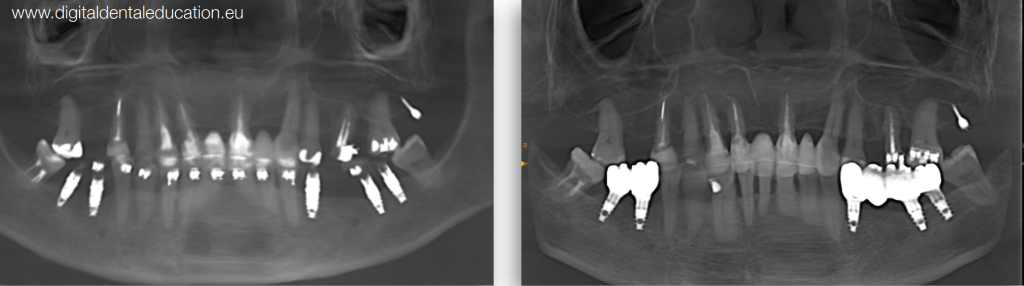
Fig 6: The panoramic radiograph after implantation.
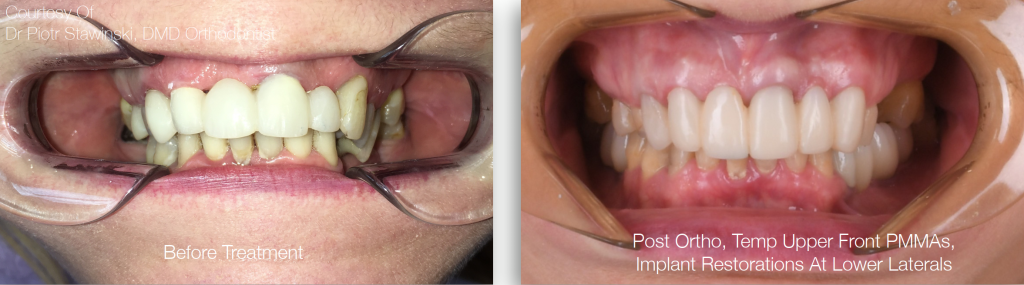
Fig 7: Left one: the situation before treatment. Right one: after treatment in the first stage, the patient had ortho, temp upper anterior teeth made with PMMA, and implant restorations at lower laterals.
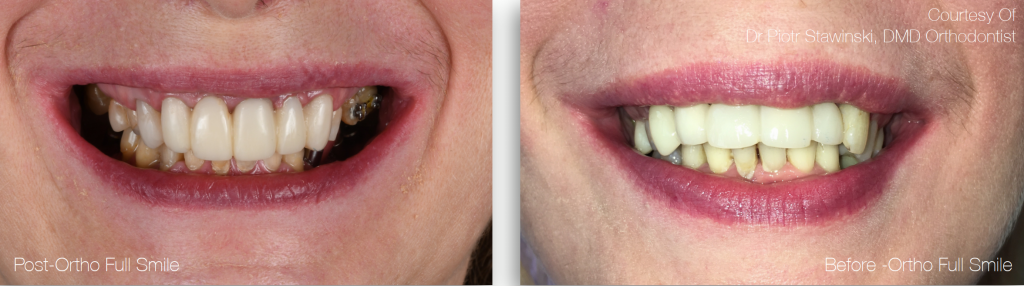
Fig 8: The comparison between Post-Ortho Full Smile and Before-Ortho Full Smile
Treatment Process – Upper Jaw Restorations
The goal now is to replace the previous upper provisional and missing teeth with crowns and bridges. Two solutions were presented to the patient, which was simulated over Smile Designer Pro simulation – either undergo gingivectomy of the laterals or osteogingivectom. The patient did not agree with the osteogingivectomy procedure. Gingivectomy, or gum reduction, the restoration was suitable enough from an aesthetic perspective for her. During PMMA temporization, pontics were recreated to achieve better hygiene and aesthetic for future final restorations.
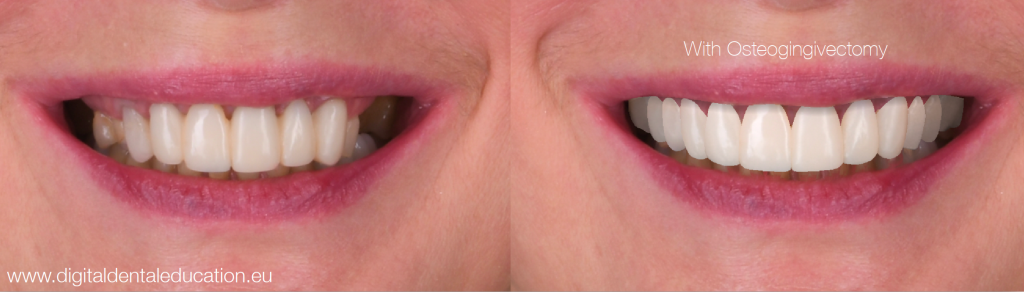
Fig 9: Smile Designer Pro 2D Simulation – With Osteogingivectomy
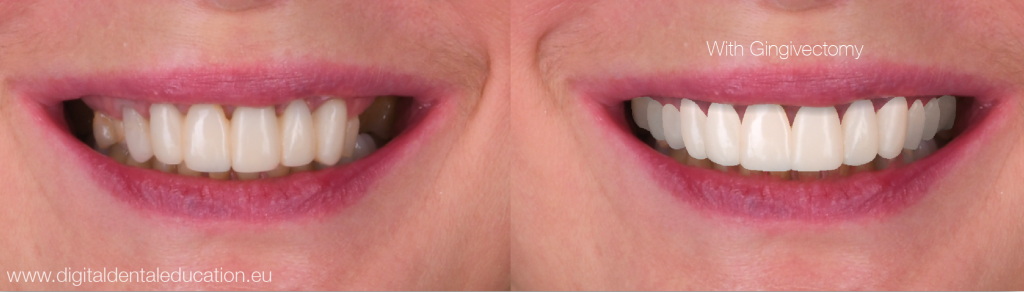
Fig 10: Smile Designer Pro 2D Simulation – With Gingivectomy Only
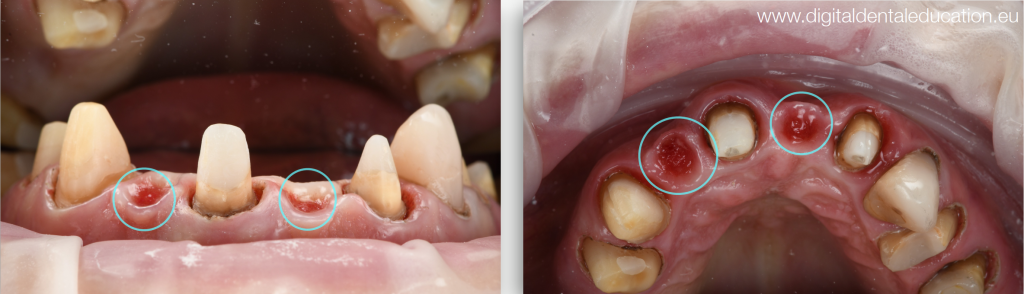
Fig 11: PMMA Temp restorations, with pontic recreation after 3 months of healing
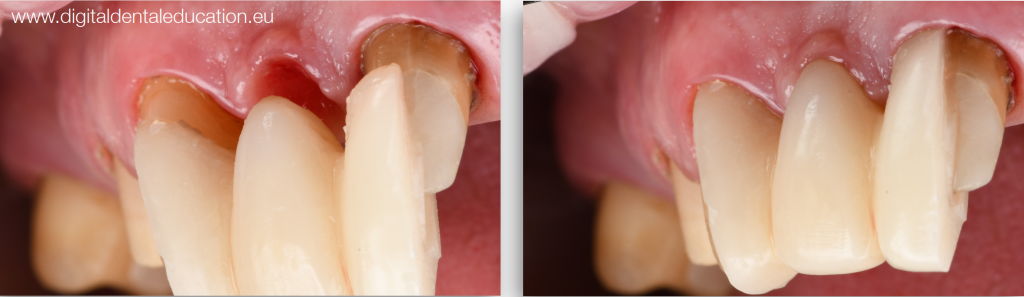
Fig 12: PMMA Temp restorations, with pontic recreation after 3 months of healing
Treatment Process – Scan and DSD in Upper Jaw
A cordless retraction was performed during the scanning procedure using a method created by the dentist, known as Dia-CT-Diathermy-Guided Chemo-Mechanical-Retraction. A gentle pocket vaporization that causes gum retraction, making it step away from the margin preparation.
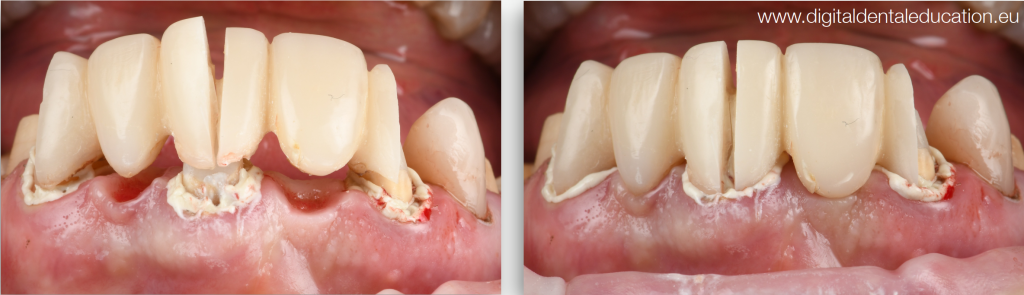
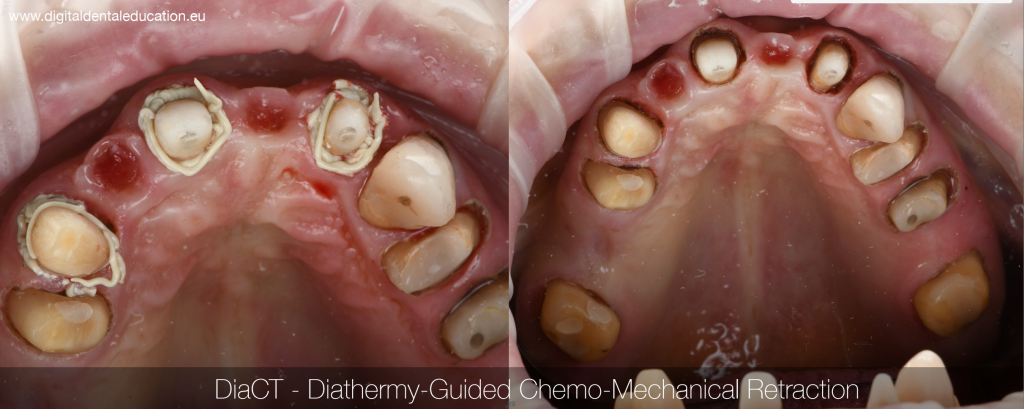
Fig 13, Fig 14: DiaCT – Diathermy Guided Chemo-Mechanical Retraction – Additional compression of retraction paste by Temp restorations.
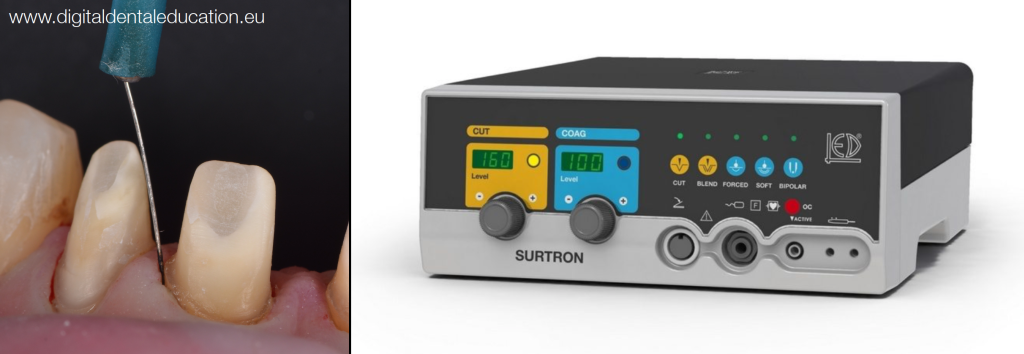
Fig 15: DiaC-Traction – (DiaC-T) – Gentle Gum Pockets Vaporization
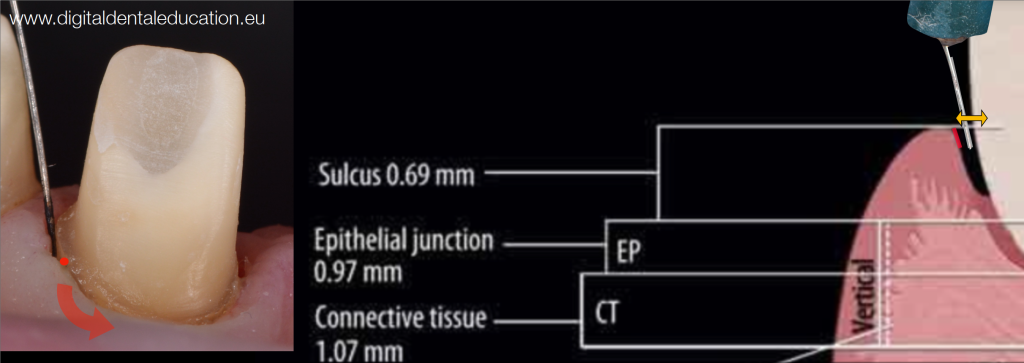
Fig 16: DiaC-Traction – (DiaC-T) – Circular Tip Movements Retracting Gum From Margin Prep
After teeth preparation, the intraoral scan data was then captured using SHINING 3D’s Aoralscan 3, which can construct a digital scan model of the teeth in less than a minute. The intraoral scan data can be viewed and edited in the software using different pre-design tools, including: undercut, margin line, etc.
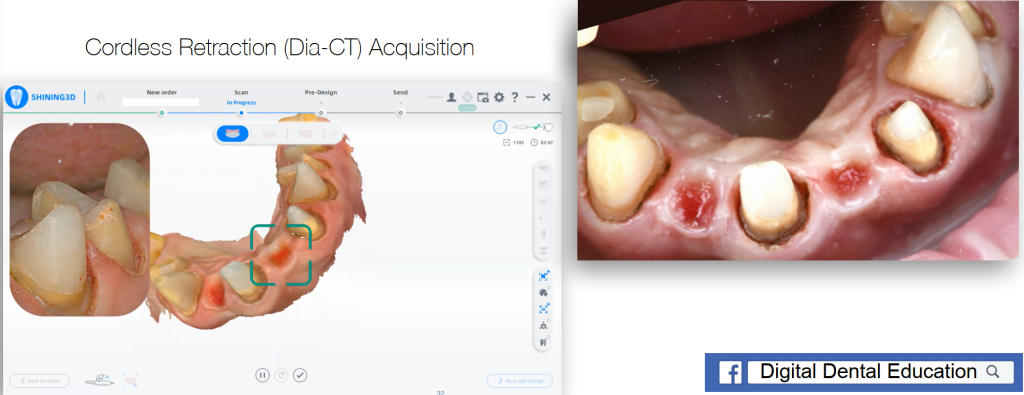

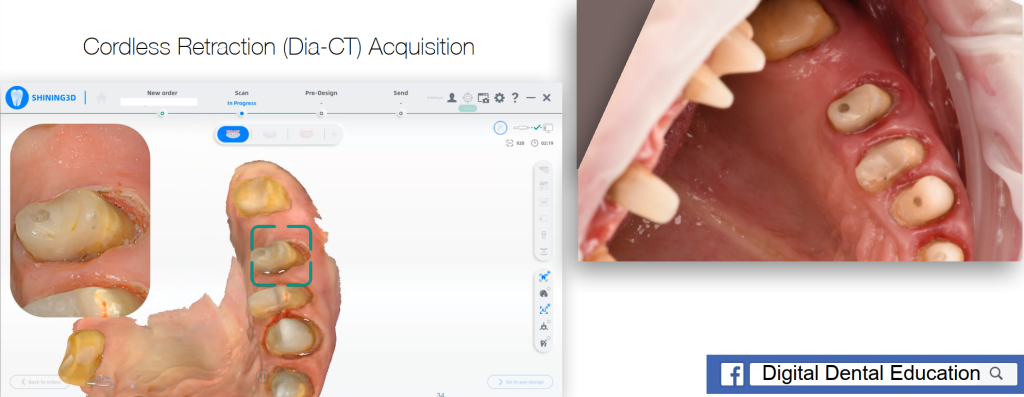
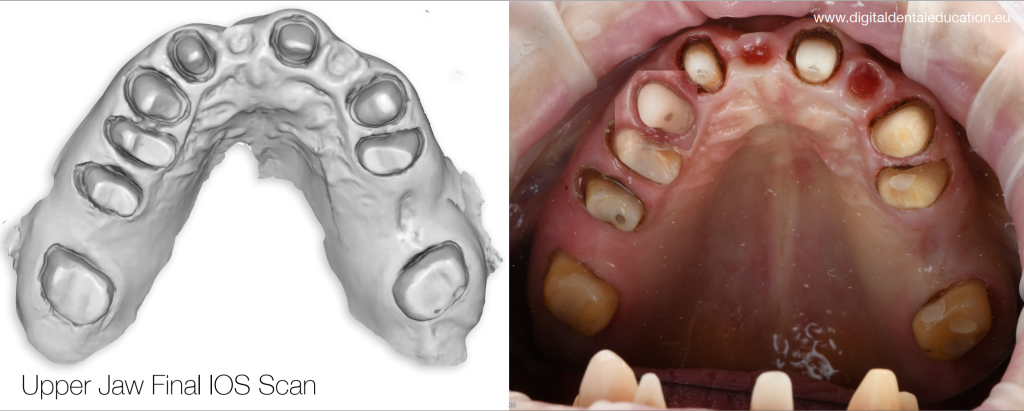
Fig 17,18, 19, 20: The scan process. The left one is the teeth data showing on the software in real-time. The right one is the picture taken by the dentist to show the real situation of the teeth. It shows that all details are captured clearly and accurately by Aoralscan 3.
Fig 21: Coordinate system adjustment in Pre-design in Aoralscan 3 software
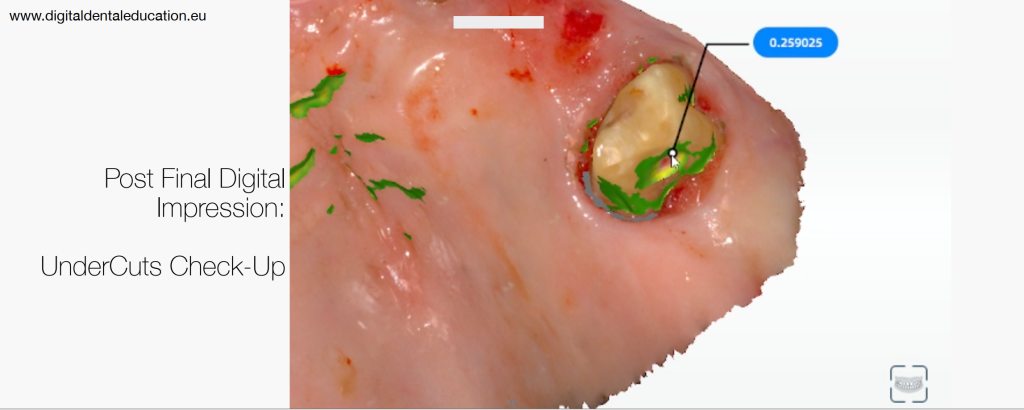
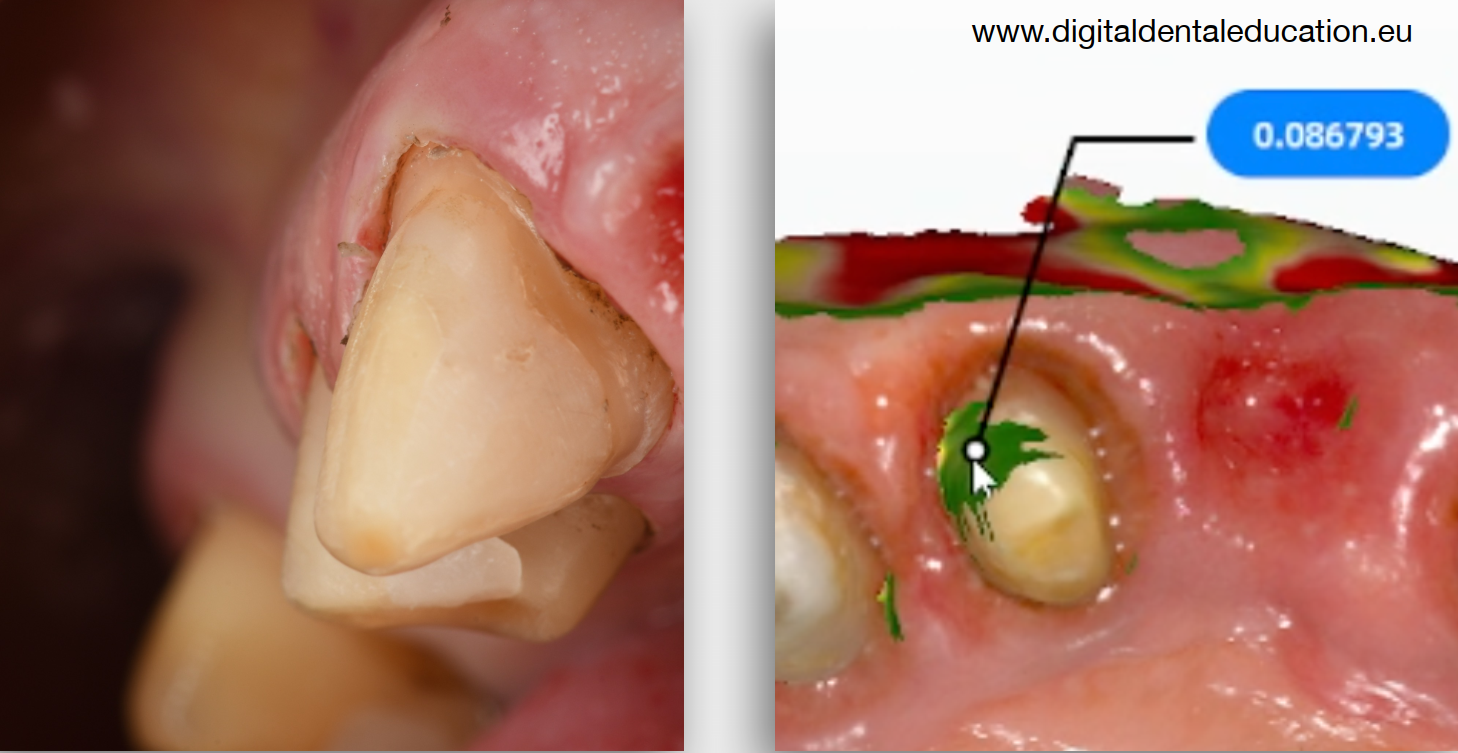
Fig 22,23: The undercuts check-up process in the Aoralscan 3 software
Scan data was matched with the 2D smile design project using author-method-FOTO-DFA procedure. A portrait photo was taken with the proper head angulation which is later aligned with the scan data to preserve planned aesthetics as well as proper positioning of the scan inside the virtual articulator.
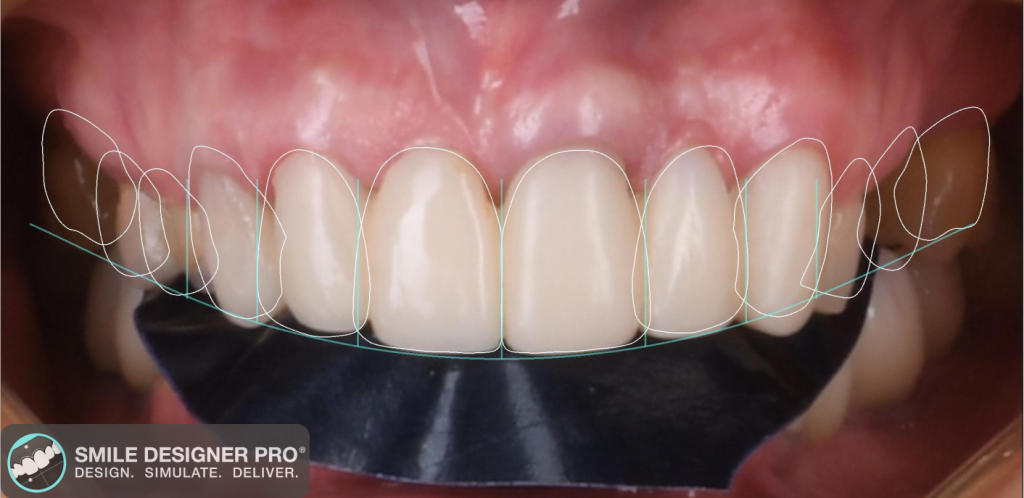
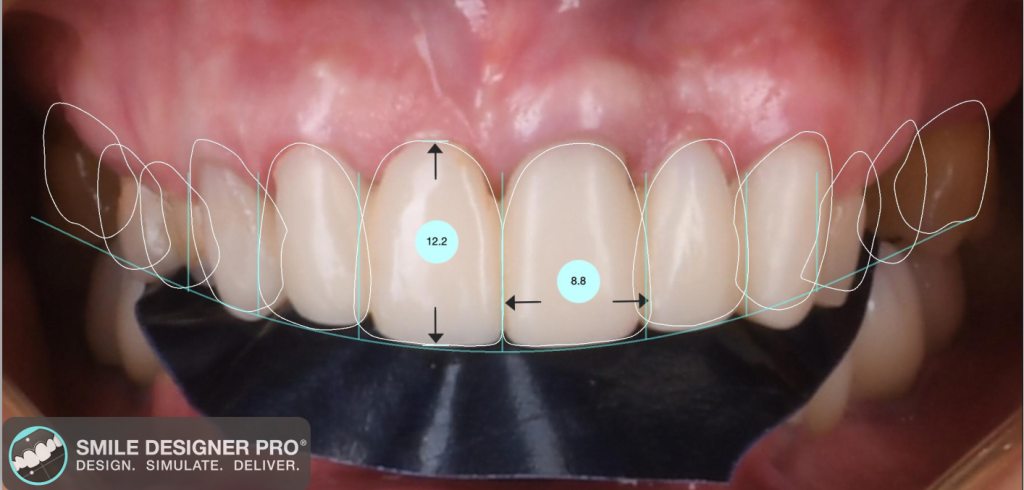

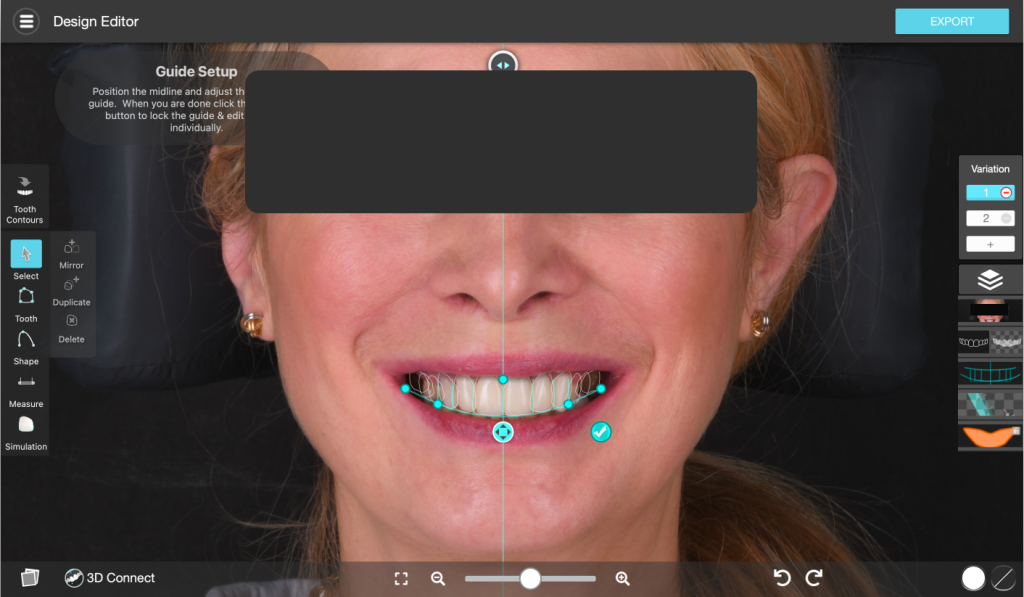

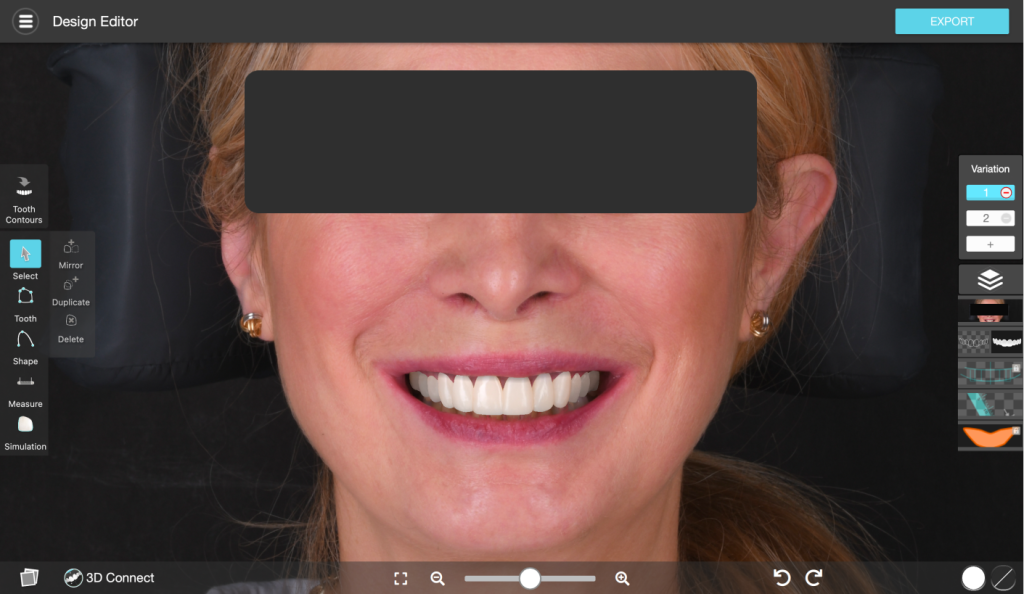
Fig 24-29: Smile Designer Pro 2D Simulation – For Gingivectomy acceptable esthetics.
After Treatment
Final restorations were made with Zirconia, and were fully accepted by the patient, who is still aware that her lower front teeth still need to be restored with ceramics in the future.
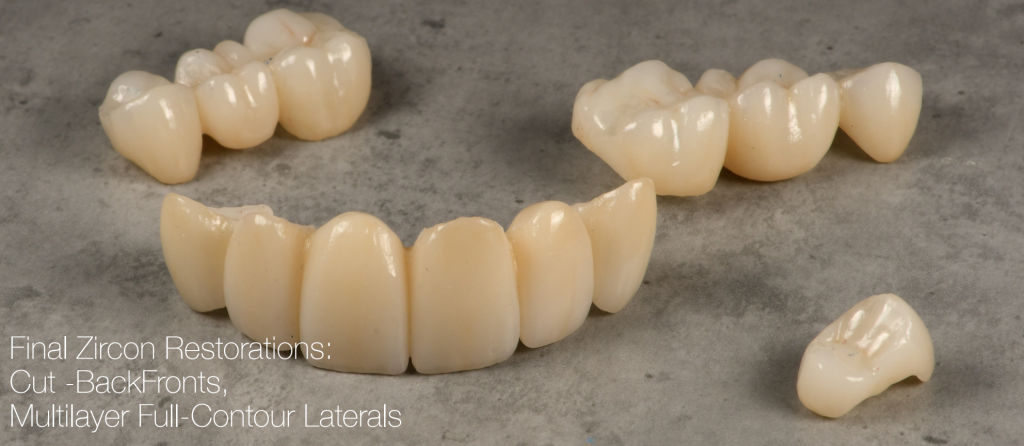
Fig 30: Final zirconia restoration with cut-back fronts and multilayer full-contour laterals.
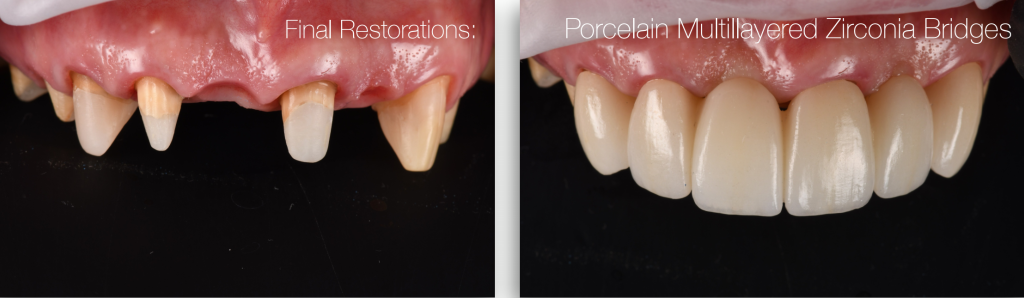
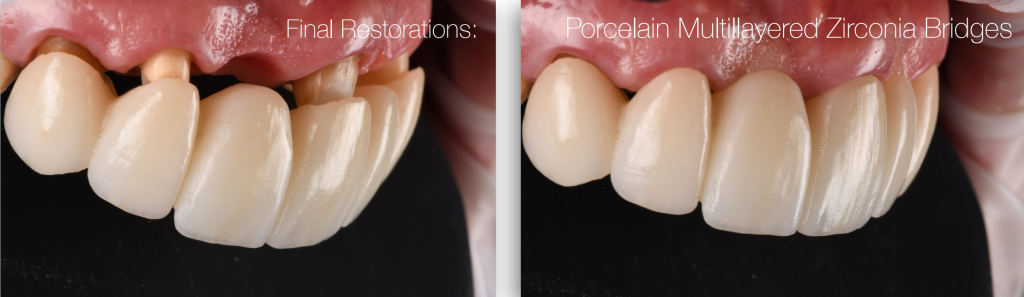
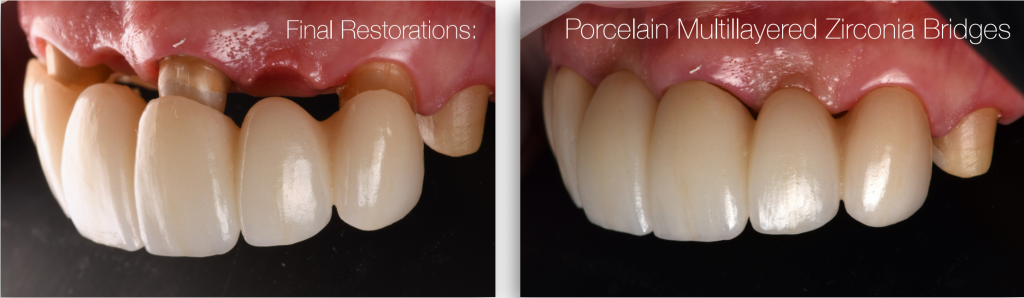
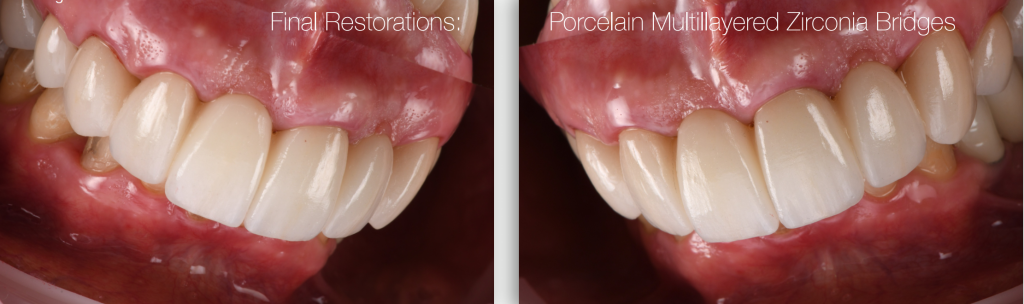
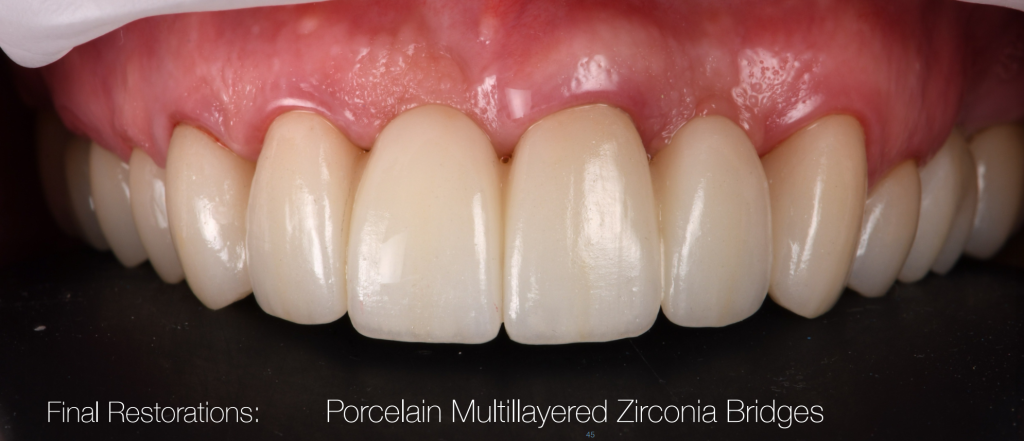
Fig 31-35: The intraoral photos after treatment. The final zirconia bridges were delivered to the patient.

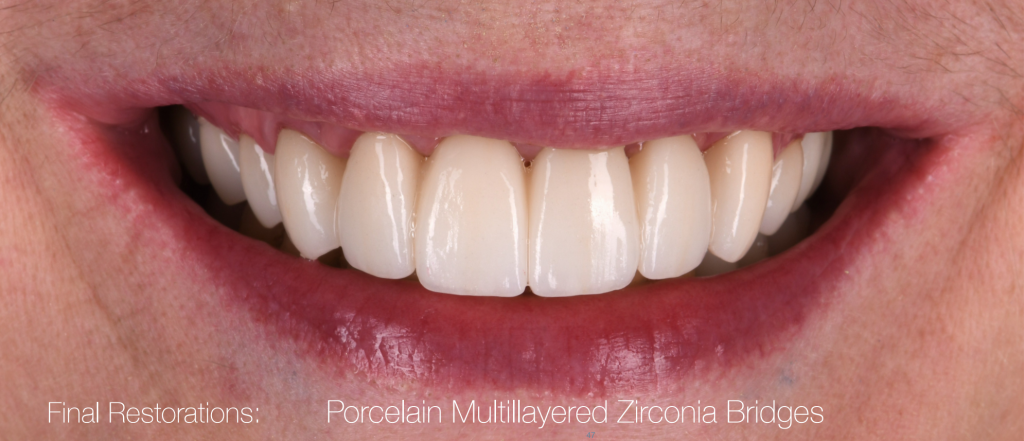
Fig 36,37: The extraoral photo after treatment, the patient is very pleased with the final result.
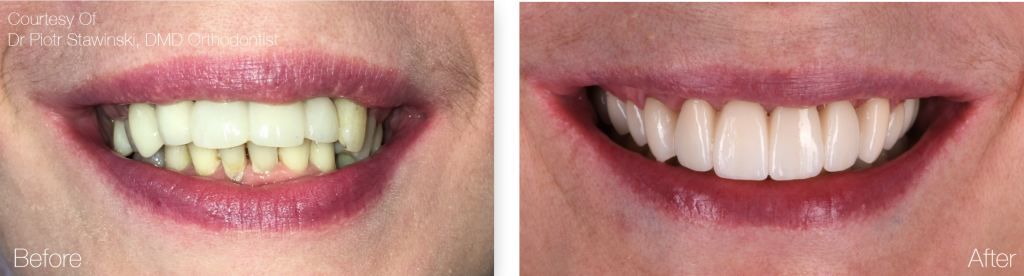
Fig 38: The comparison between “before treatment”(the left one)and “after treatment”(the right one)
About Author
Pawel Szuba-Paszkiewicz graduated with honors from the Faculty of Dentistry at the Medical University in Wroclaw in 2004. Pawel Szuba-Paszkiewicz performs treatments of complex medical procedures in the field of CAD/CAM prosthetics, implant prosthetics, full-mouth rehabilitation and minimally invasive aesthetic dentistry. Nowadays, his professional interest is focused on digital prosthodontics and implant prosthetics with a complete digital workflow. He has developed and introduced his own innovative procedure of tissue retraction during digital prosthetic procedures, the Endo-Resto Single Visit Chairside Restoring Workflow, as well as the innovative, fast and complex Smile Design & Delivering Protocol (SDDP), “Photo-DFA” workflow.
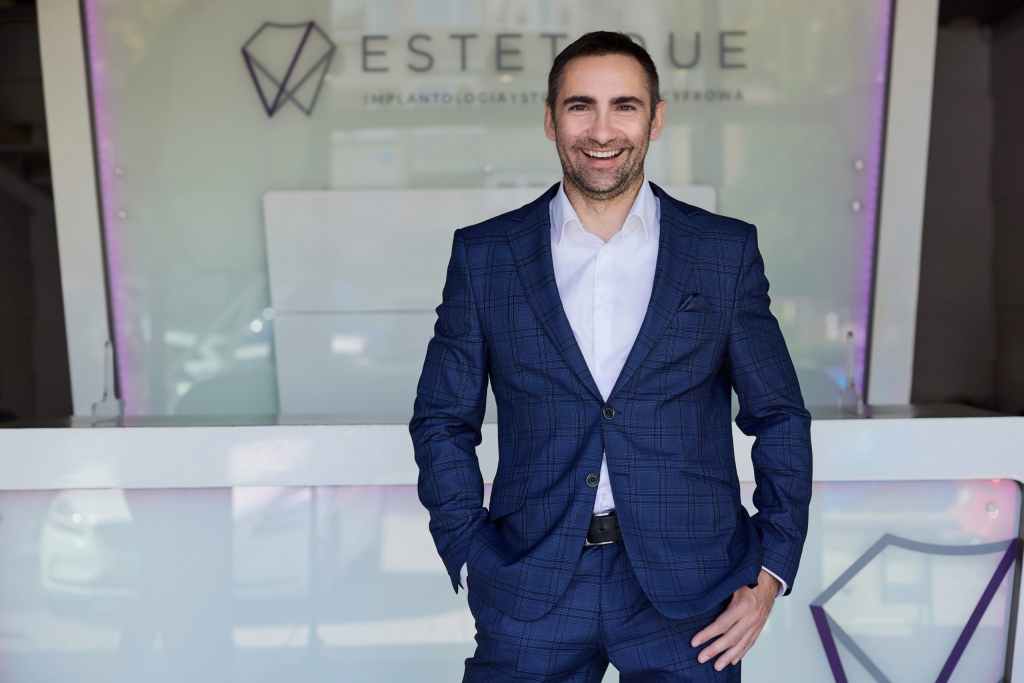
Fig 39:Dr. Pawel Szuba-Paszkiewicz