 ENG
ENG


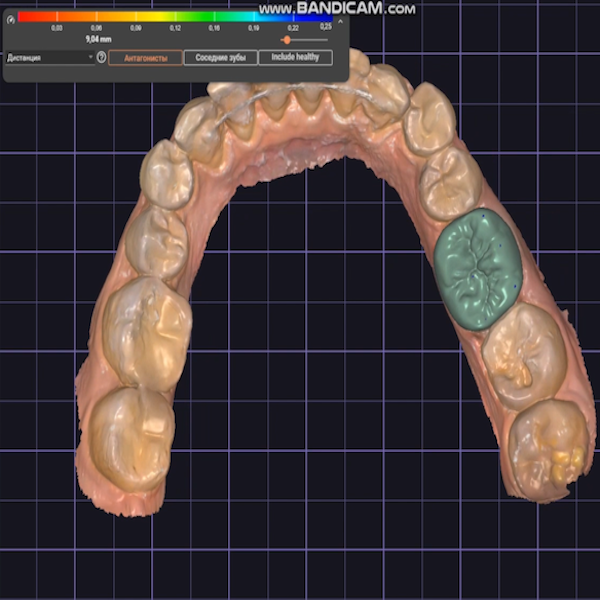
Table of Contents
As the concept of digital dental diagnosis and treatment continues to gain popularity, more and more dentists turn to digital devices to get their work done, such as Aoralscan 3, exocad, and the L4D printer. Today’s case is from Dr. Golovanova Polina Andreevna, a professional dentist with rich experience. She devoted herself to reducing patients’ pain and rebuilding their smiles. Now, with the instructions from SHINING 3D, she can do it more efficiently and easily in the treatment of posterior teeth restoration.
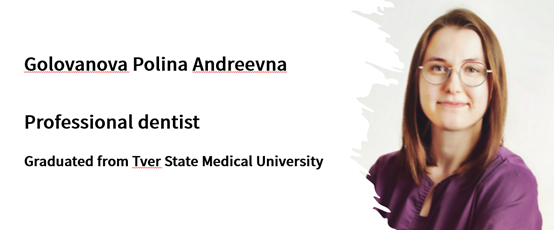
Figure 1: Dr. Golovanova Polina Andreevna
Background
More than 80% of the patient’s #36 tooth was destroyed, which led to unbearable pain and severely affected his quality of life. His appeal was to eat normally without pain after treatment.

Figure 2: Teeth tissue after moving caries
Making Fiber Post
Despite such a large area of caries and defects, Dr. Golovanova Polina Andreevna tried her best to adopt minimally invasive restoration as much as possible to preserve the patient’s tooth root. By removing old fillings, she incised the distal canal section and repaired it with fibrous piling. The elasticity modulus of fibrous posts is similar to that of tooth tissue, which is conducive to the transmission of stress to the surface of the root, thereby reducing the stress concentration in the root. When subjected to outer force, it will fracture first, so as to protect the tooth tissue and reduce the risk of root fracture.
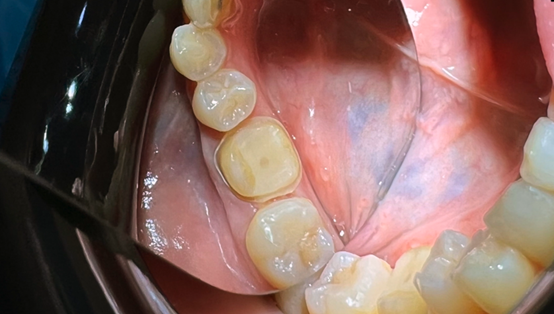
Figure 3: Fiber post and teeth preparation
Teeth Preparation
Dr. Golovanova Polina Andreevna prepared the shape of the fibre post into an abutment. The margin line is above the gingiva, making it easier for the scanner to obtain the margin line. An accurate and clarified margin line is the prerequisite for a good posterior teeth restoration.
Scan
Dr. Golovanova Polina Andreevna used SHINING 3D’s Aoralscan 3 to achieve the oral data. Aoralscan 3 is fast, exceptional, smart and elegant, perfect for replacing traditional physical impressions.
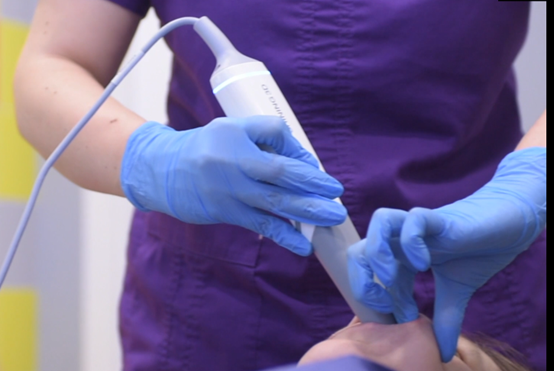
Figure 4: Digital scan with Aoralscan 3
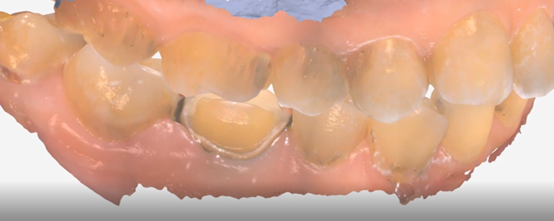
Figure 5: The scan data
Design
Usually, we use exocad to design restorations. It is so powerful that it covers all design requirements of dental clinical applications.
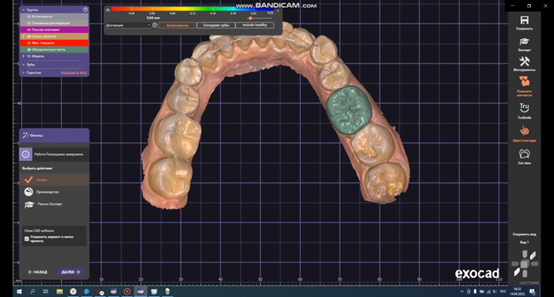
Figure 6: Computer-aided design by exocad
Print Models
AccuFab-L4D can be used to print dental models needed during the treatment. Dr. Golovanova Polina Andreevna used DM12 photopolymer resin to print models. L4D is a printer designed for dentistry. The required model can be quickly printed out, and the high-precision model can replace the plaster model for quality inspection.
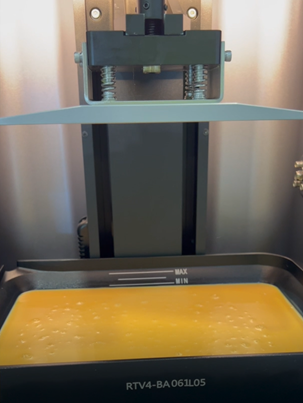
Figure 7: Model printed by L4D
Post-processing
The printed models were post-processed with FabCure to make them more stable for long-term storage.
Try-on
Try on the finished crown on the printed model to check whether the occlusion, margin line, proximal contact and overall morphology of the restoration meet the requirement. If the restoration is not suitable, it can be detected and adjusted.
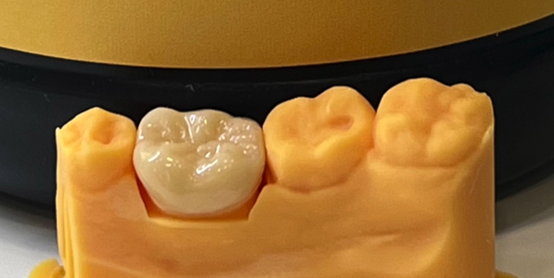
Figure 8: Try-on the finished crown on the printed model
Wear Crown
Dr. Golovanova Polina Andreevna used a rubber dam to block moisture in the mouth, put the restoration in the patient’s mouth, made the final adjustments, and fixed it with a permanent adhesive.
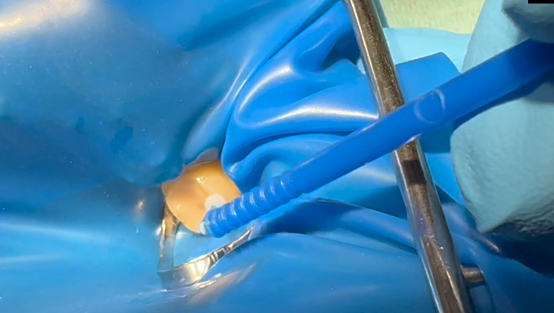
Figure 9: Wear a crown
This is the entire diagnosis and treatment process of posterior teeth restoration. Compared with traditional methods, it is more efficient, cost-effective, comfortable, and ultimately achieves better therapeutic effects. These are based on the extensive application of digital technology.
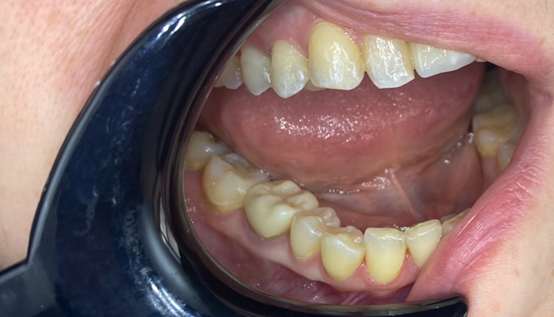
Figure 10: Oral maxillofacial view
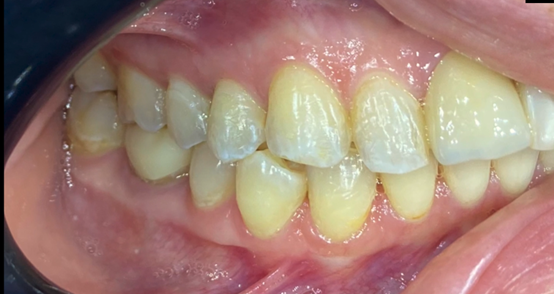
Figure 11: Oral buccal side view