 ENG
ENG


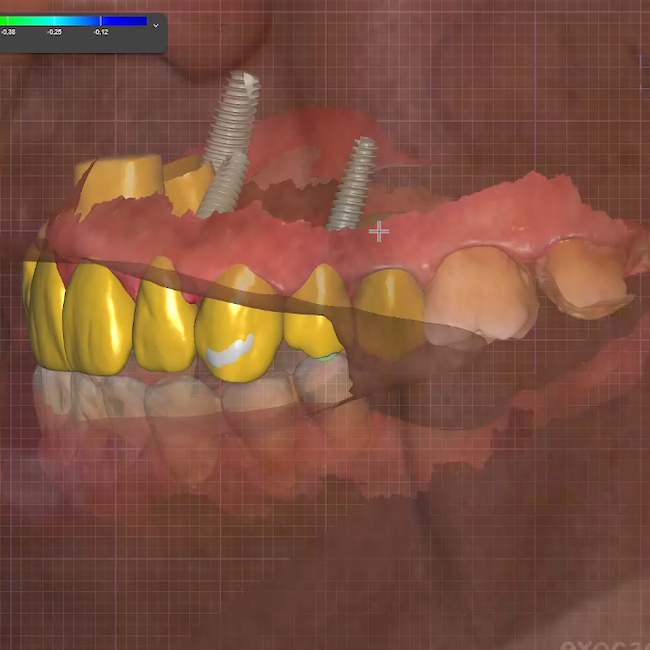
Table of Contents
The digital workflow to restore a full mouth fixed implant rehabilitation consists of 5 different steps: digital data collection, digital planning, template-guided surgery, restoration design and manufacture with CAD/CAM technology. Today’s case comes from Luis Estuardo Pacheco, an experienced dentist in Guatemala, who has established his own dental studio to help patients rebuild their smile and share a case of full oral rehabilitation with implants and veneers.
Case Profile
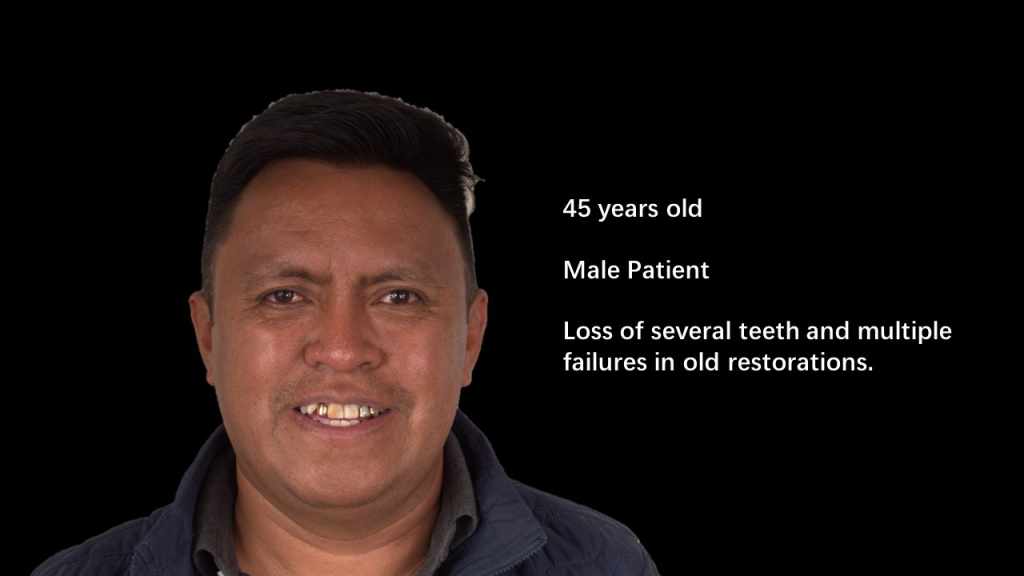
Fig 1: The patient who have a loss of several teeth and multiple failures in old restorations
This patient is 45 years old and had lost several teeth and multiple failures in old restorations. Due to these issues, he had some problems with chewing and pronunciation. He was dissatisfied with the look of his smile as well and decided to come and inquire about treatment to change this situation.
Digital Data Collection
Upon his arrival, the dentist used an Aoralscan 3 to capture his intraoral data. The Aoralscan 3 is a very elegant dental scanner that can capture intraoral data quickly and construct a 3D model in real time. Next,a panoramic radiograph was taken to check the bone situation of the patient from which we can evaluate the place to implant the bodies. Face scan data was then captured by a SHINING 3D facial scanner. After collecting all of the necessary information, a digital virtual patient had been established which not only made it easier for the dentist to have effective communication with the patient but also to get a more comprehensive and accurate diagnosis. At the same time, a DSD simulation was taken to have the patient foresee his future smile, which would aid greatly in visualizing the estimated treatment effect.
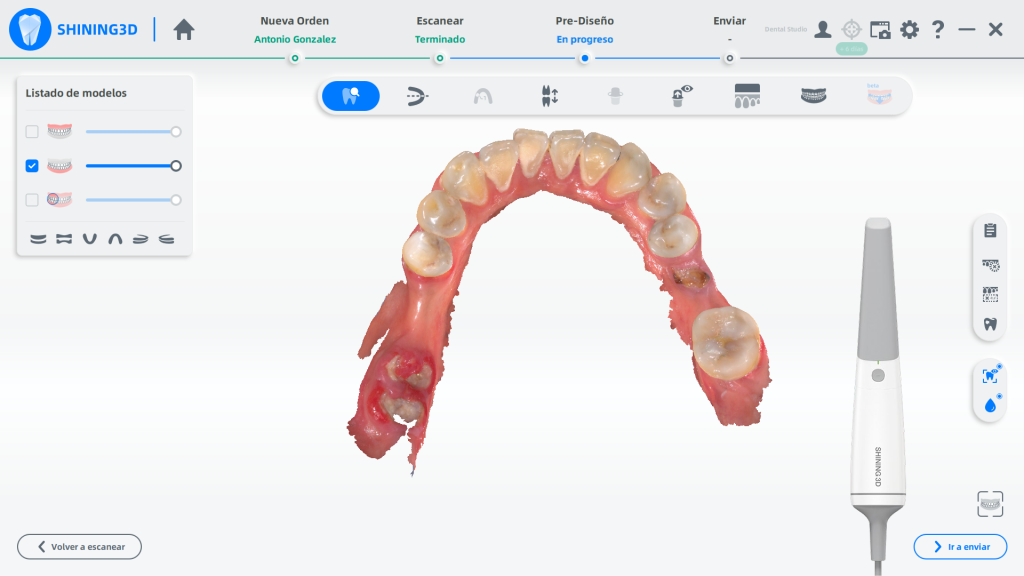
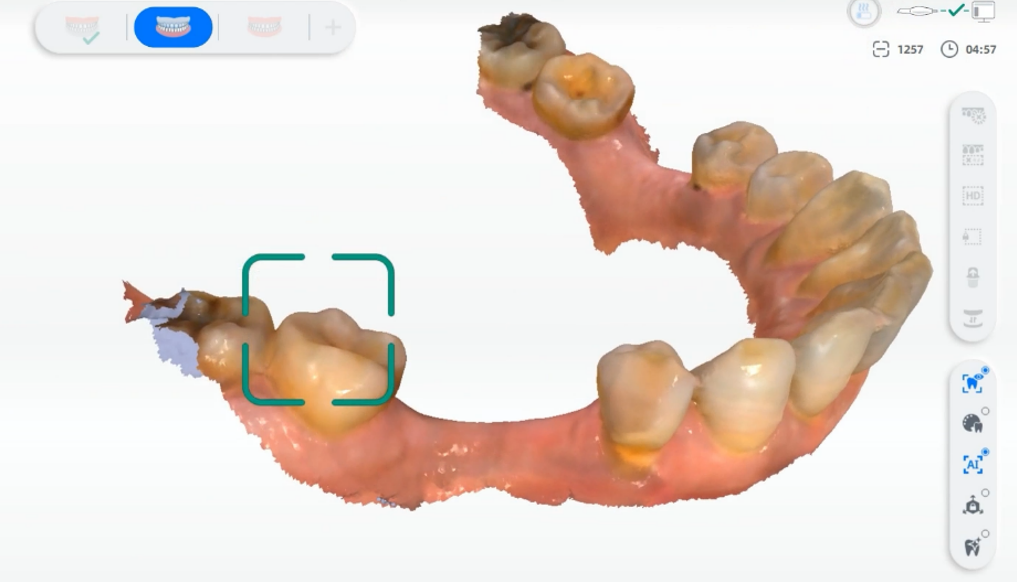
Fig 2,3: The intraoral scan data of lower jaw and upper jaw, the metal teeth can be captured clearly.
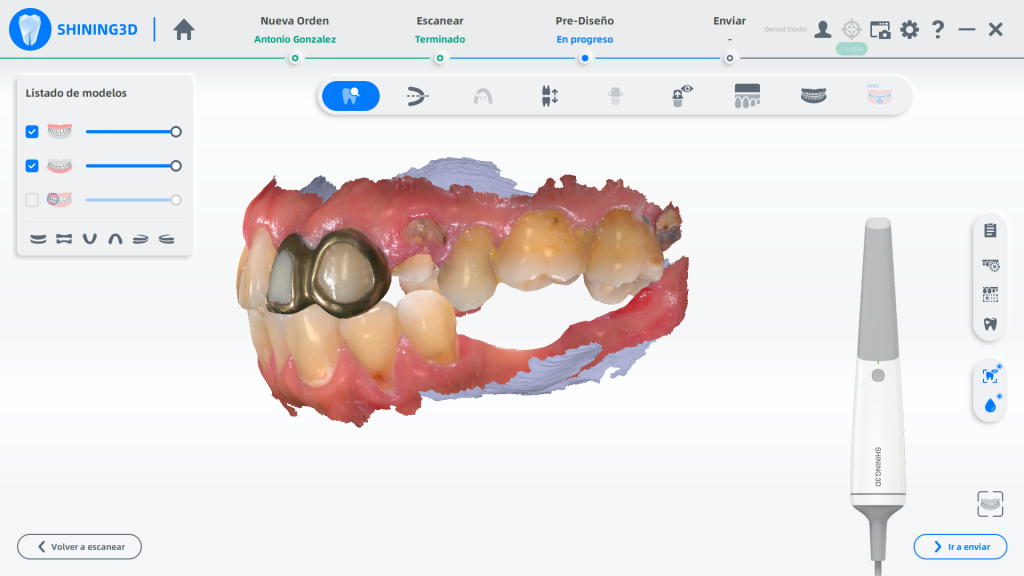
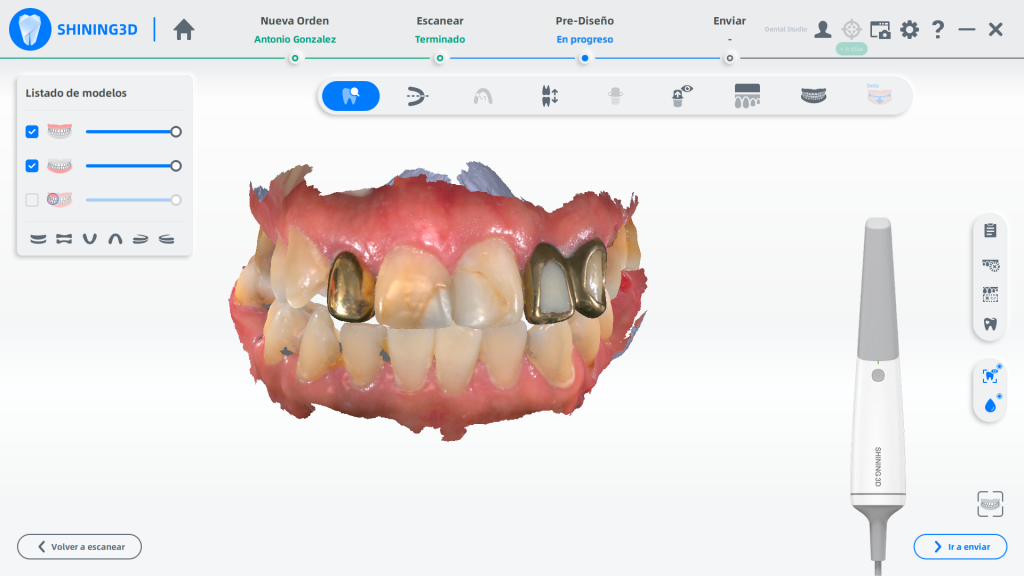
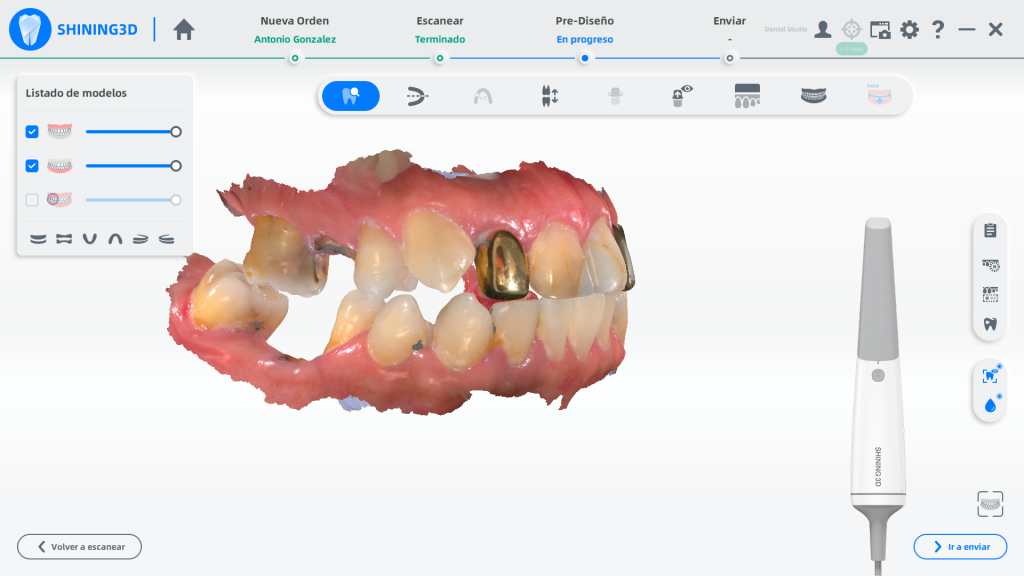
Fig 4,5,6: The intraoral scan data of occlusion from left, center, right view.
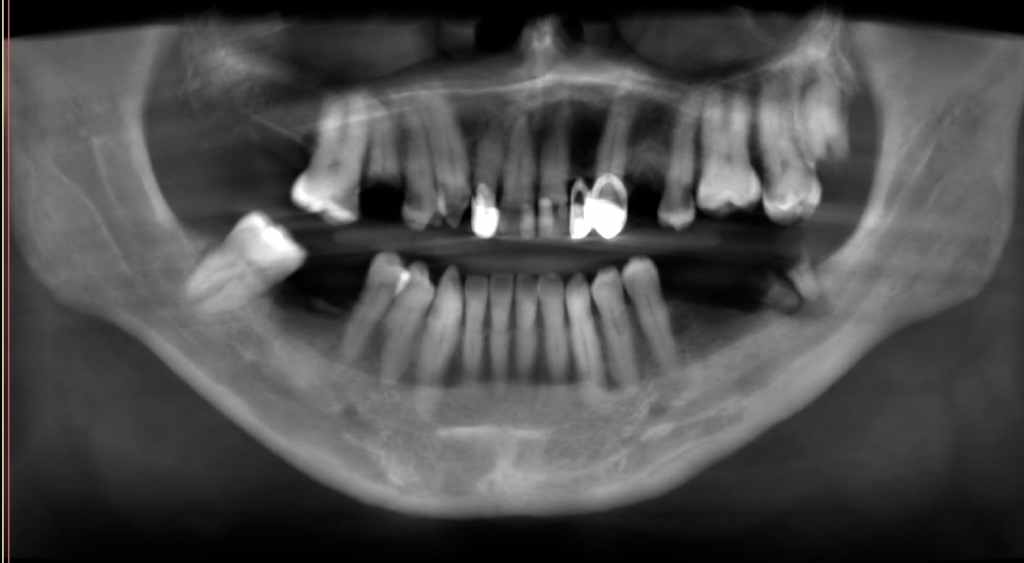
Fig 7: The panoramic radiograph of the patient before treatment.
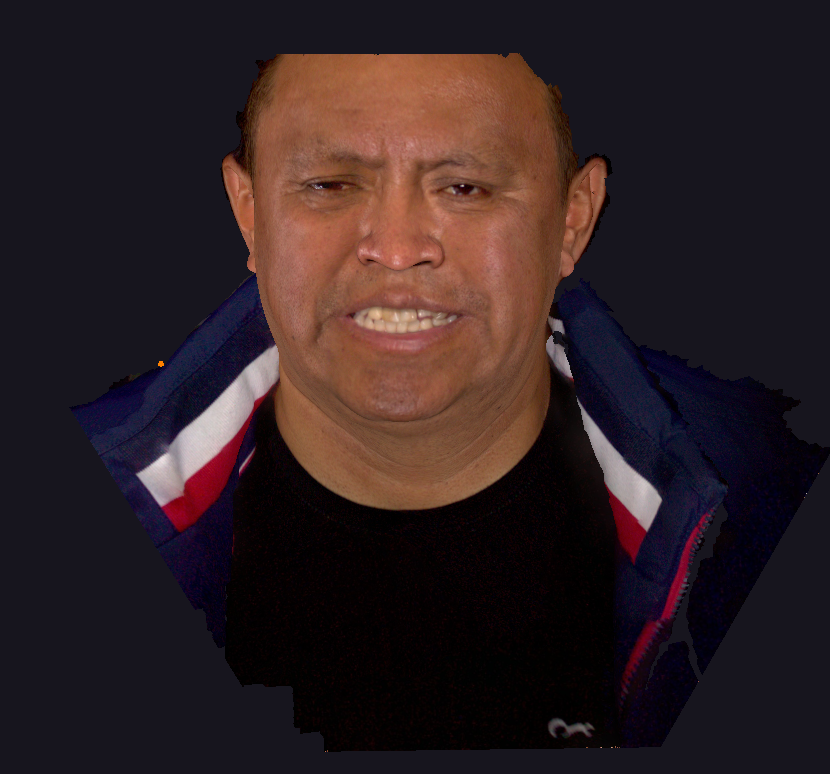
Fig 8: The facial data scanned by a face scanner produced by SHINING 3D.
Treatment Plan
The initial treatment plan is to have implant prostheses in the upper jaw and lower jaw. However, due to the financial issues and the long-time treatment period, the patient finally chose to have the upper jaw repaired and left the lower jaw as is. He will have another treatment of the lower jaw in the future.
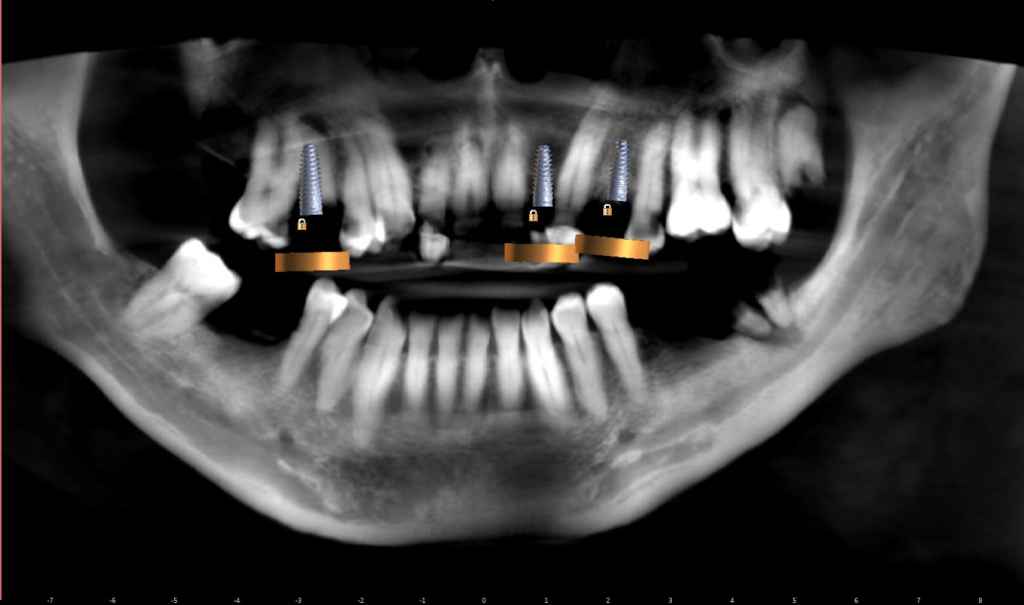
Fig 9: The treatment plan, three implant bodies were designed to implant into the upper jaw.
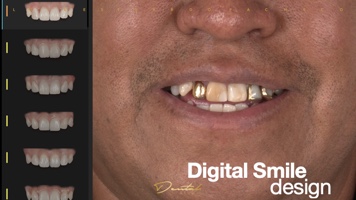
Fig 10: DSD simulation process. By selecting the shade and the morphology in the teeth database, patient can foresee his future smile.
Treatment Process – Surgical Guide Design and Print
After setting the treatment plan, the next step is to design the surgical guide. The surgical guide can increase the predictability of dental implant treatment outcomes.
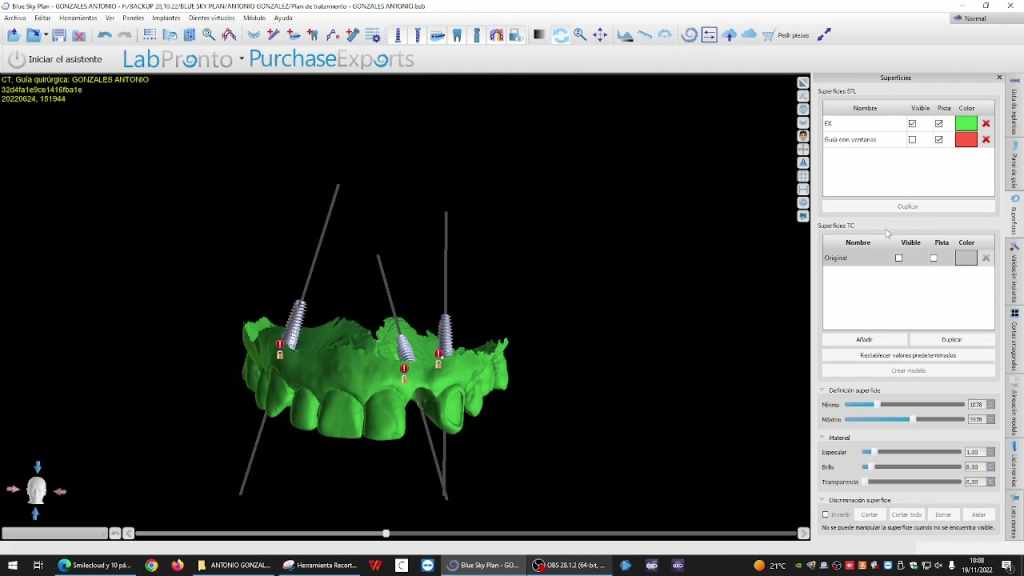
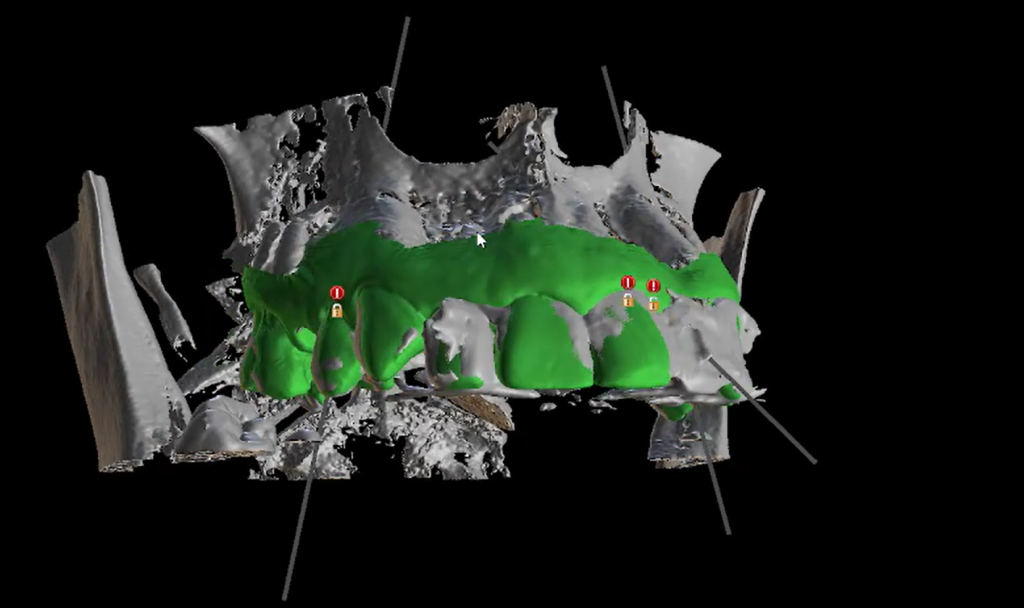
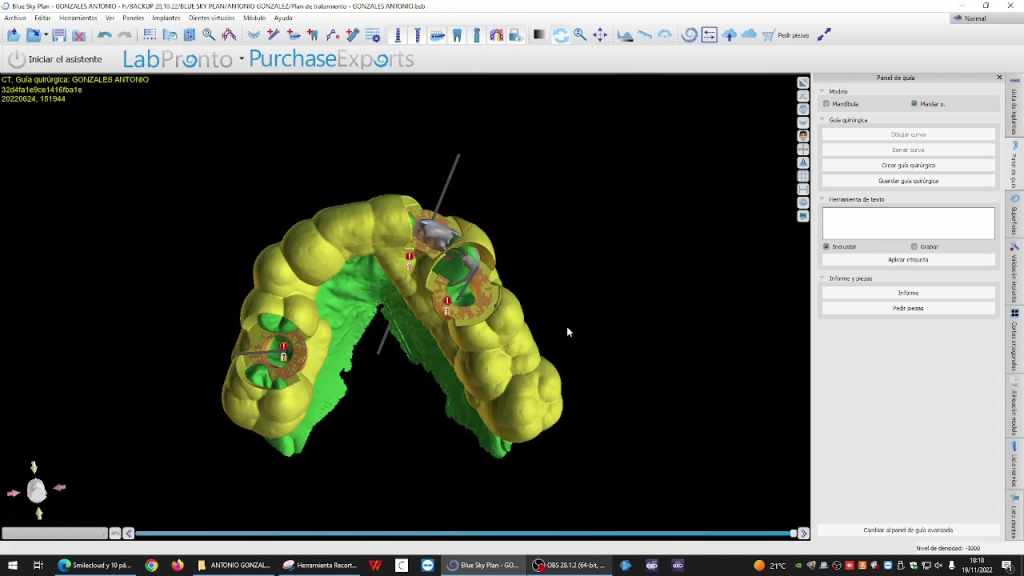
Fig 11,12,13: Design the implant surgery guide.
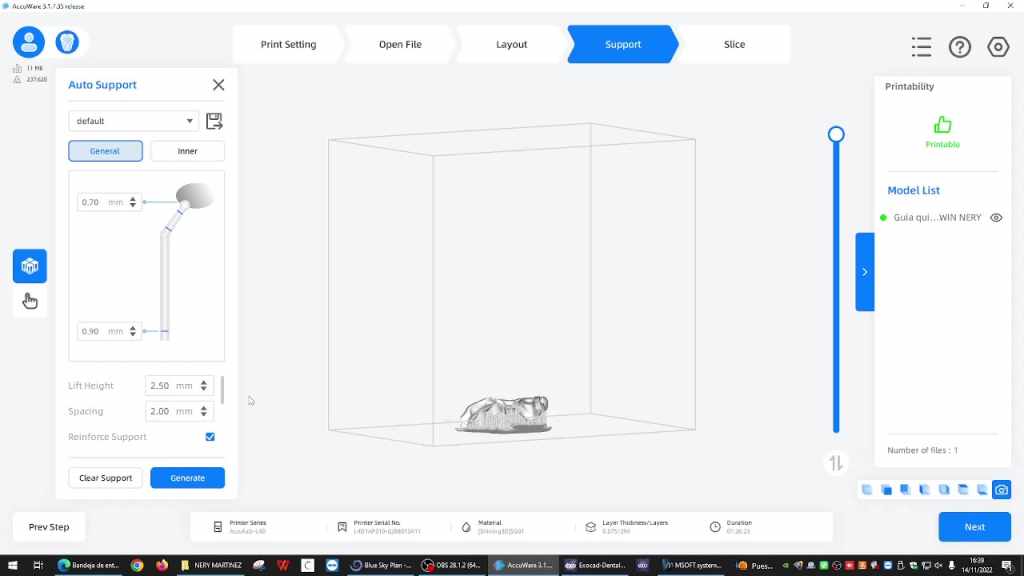
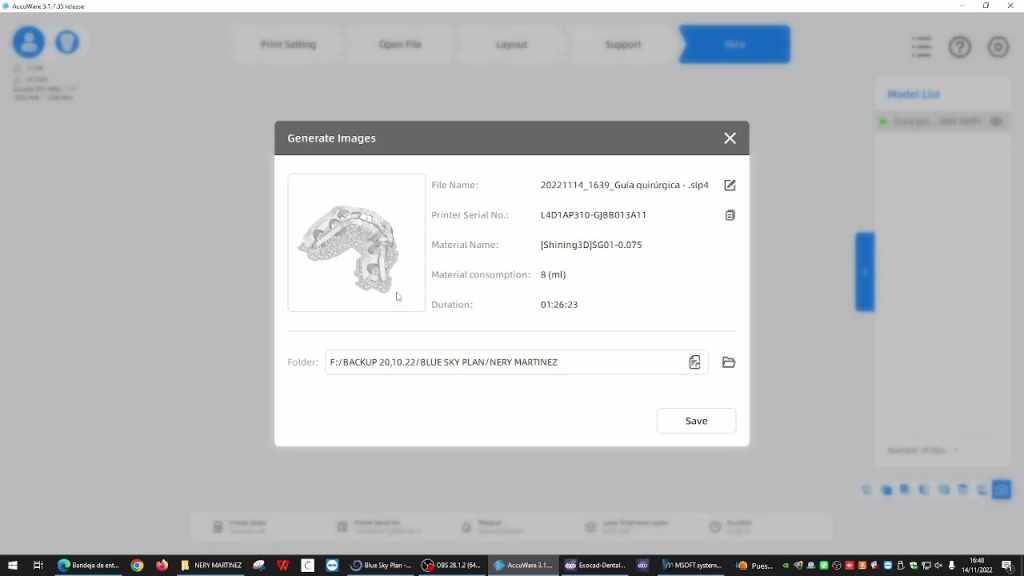
Fig 14, 15: Slicing process in Accuware.
The designed surgical guide can be imported into Accuware for slicing and the generated document can then be imported into the printer for direct printing. After the surgical guide was ready, the dentist carried out the implant surgery for the patient, and allowed some time for wound recovery and osseointegration.
Treatment Process – Make Upper Restorations
When the patient returned two months later, the dentist rescanned to capture the intraoral data and imported it into exocad, along with the facial data, which would give a comprehensive inference to the technician who design the implant support restorations.
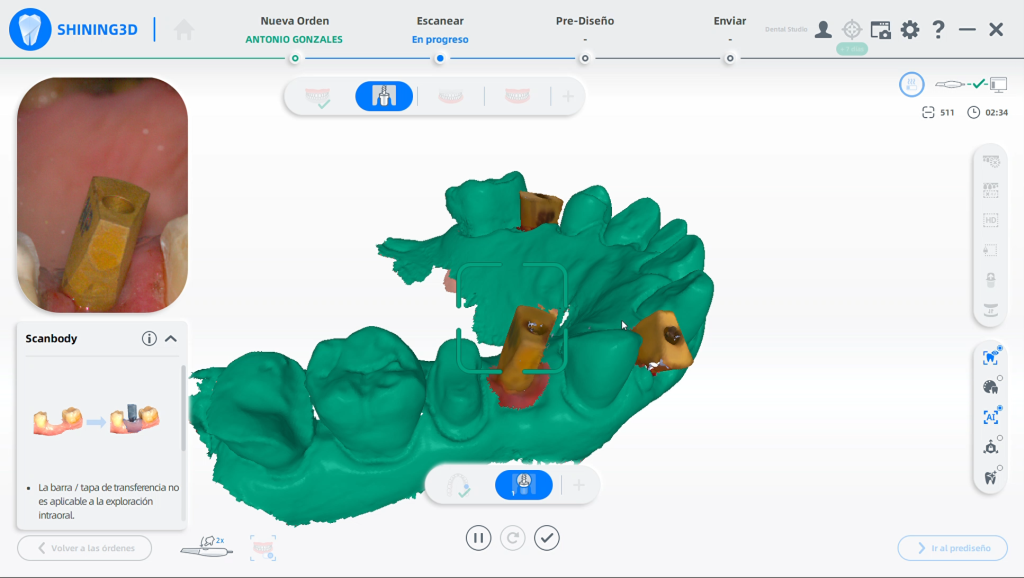
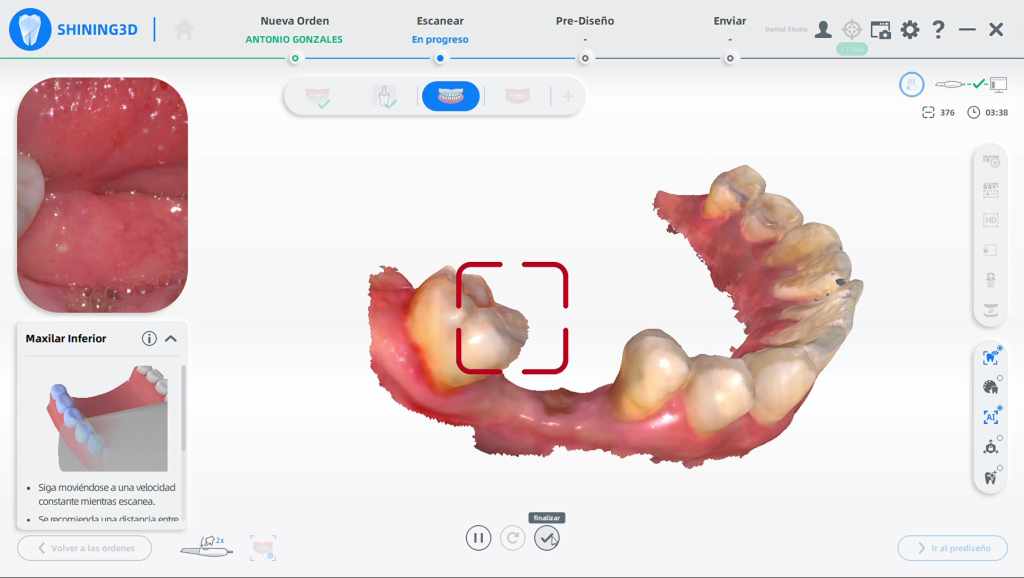
Fig 16,17: Scan upper jaw and lower jaw.
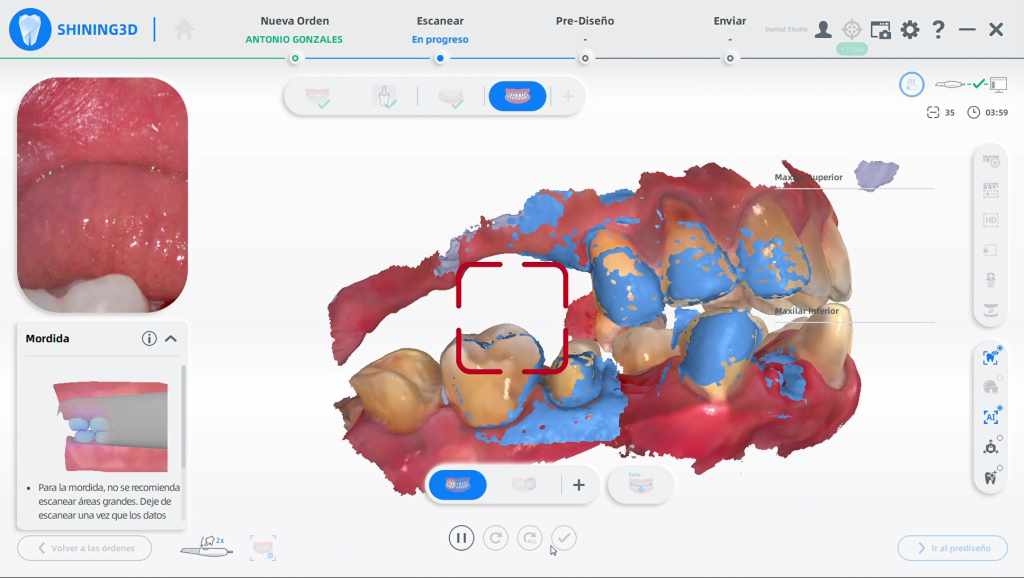
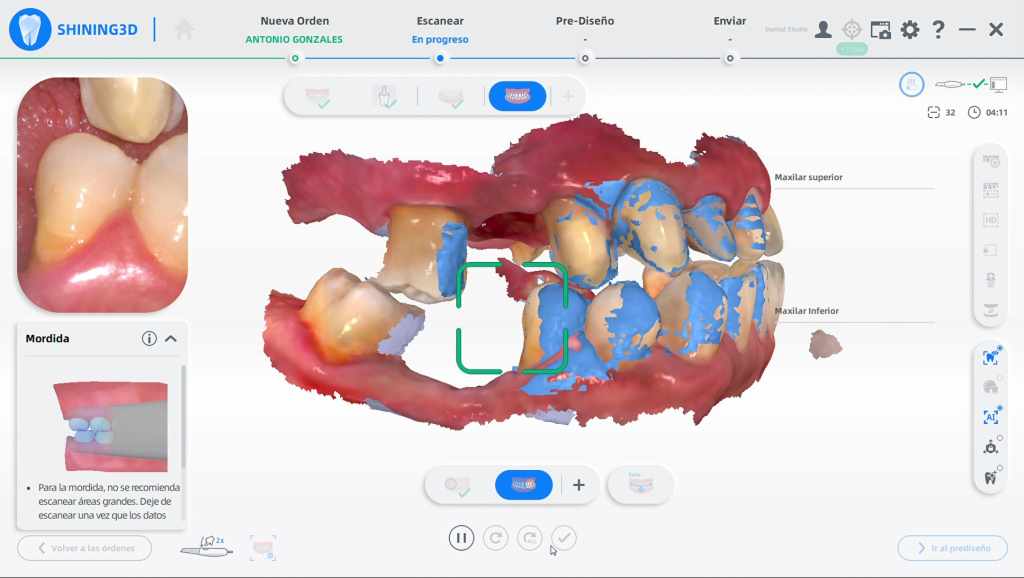
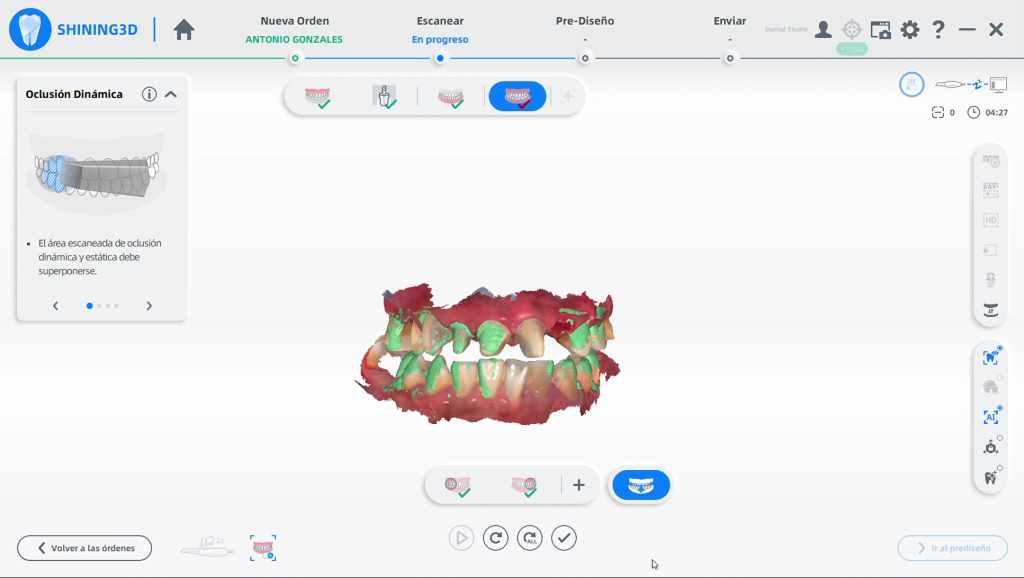
Fig 18, 19, 20: Scan the occlusion at right, left, center view.
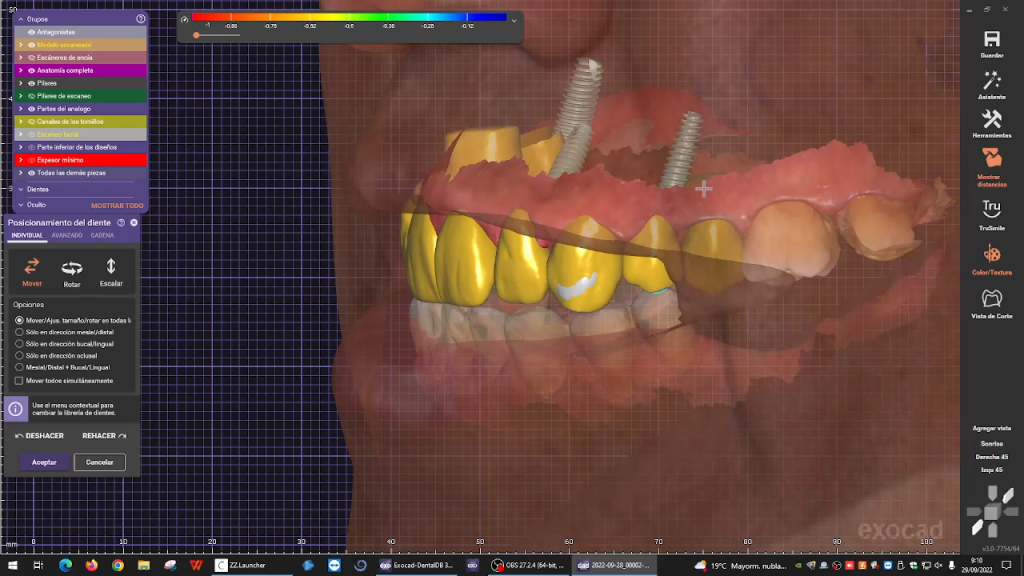
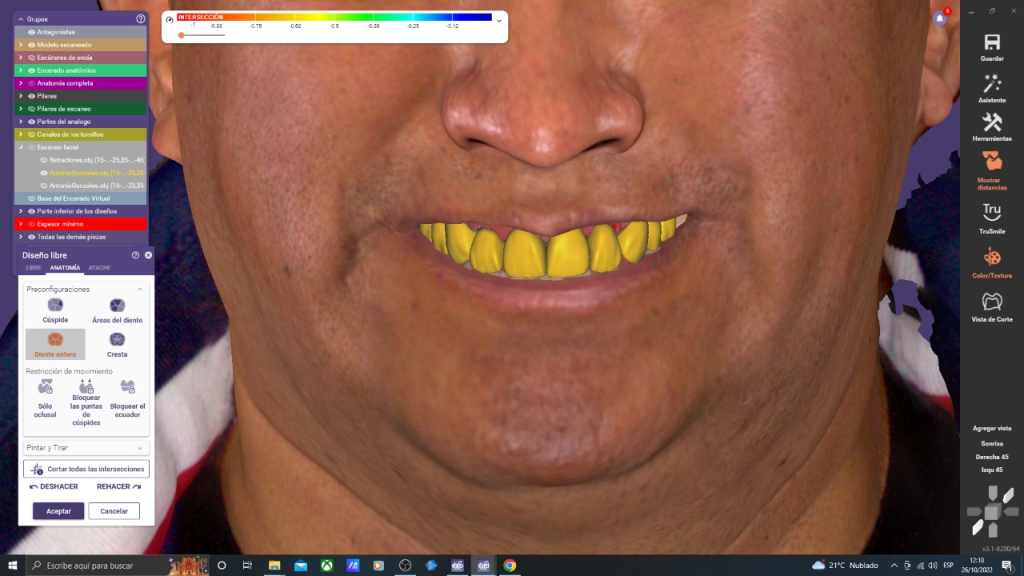
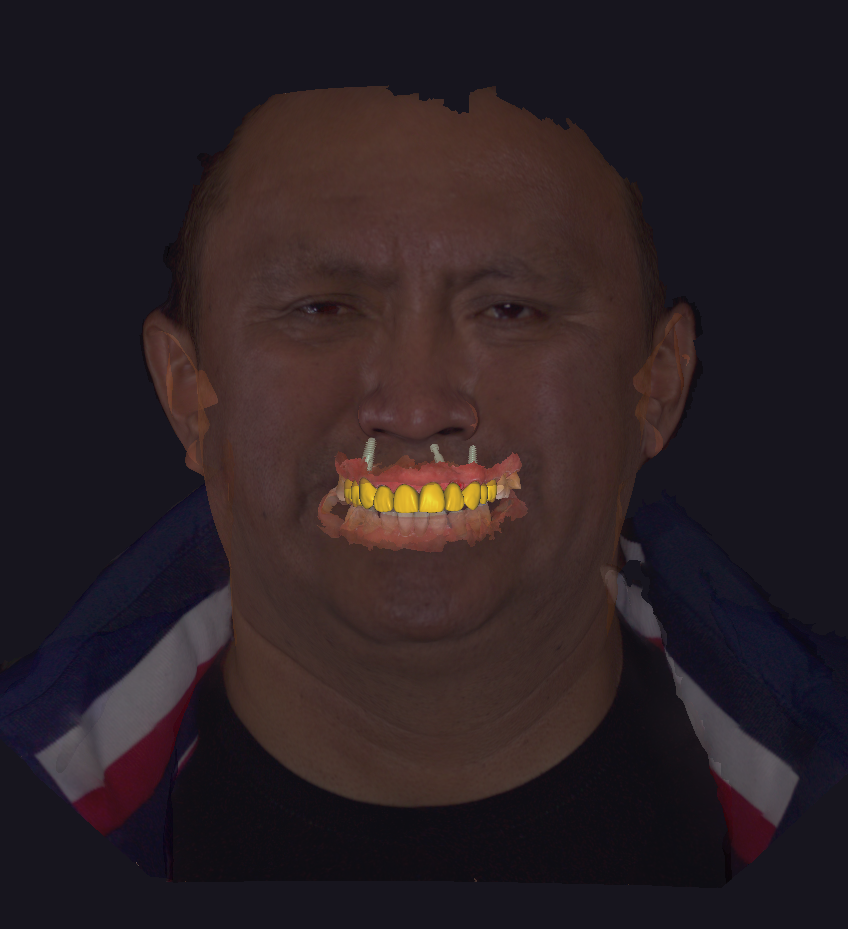
Fig 21,22,23: The design process in exocad.
Upon completion, the STL document was sent to labs for manufacturing. The final restorations were made with zirconia, and a model was printed with an AccuFab-L4K using resin DM12 for quality inspection.
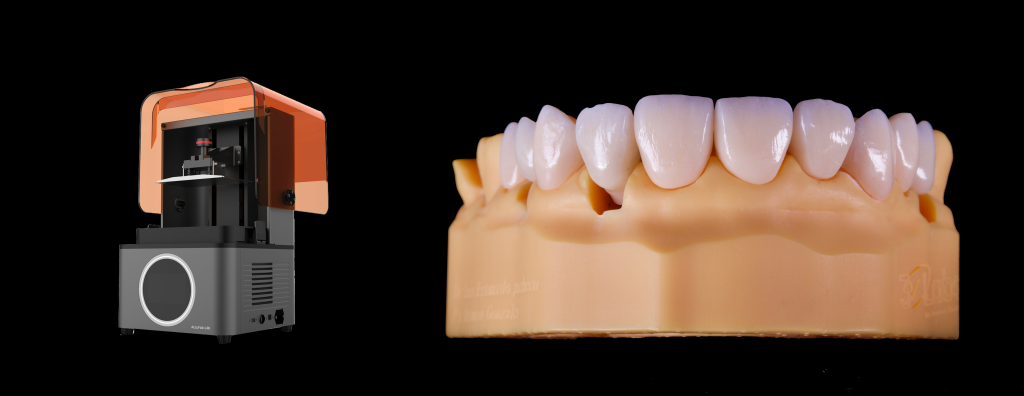
Fig 24: The model printed using AccuFab-L4K for quality inspection.
Treatment Process – Delivery of Final Restoration
After a professional cement process with the help of a rubber barrier, the zirconia restoration was fixed into the right place, and the patient was very satisfied with the result.
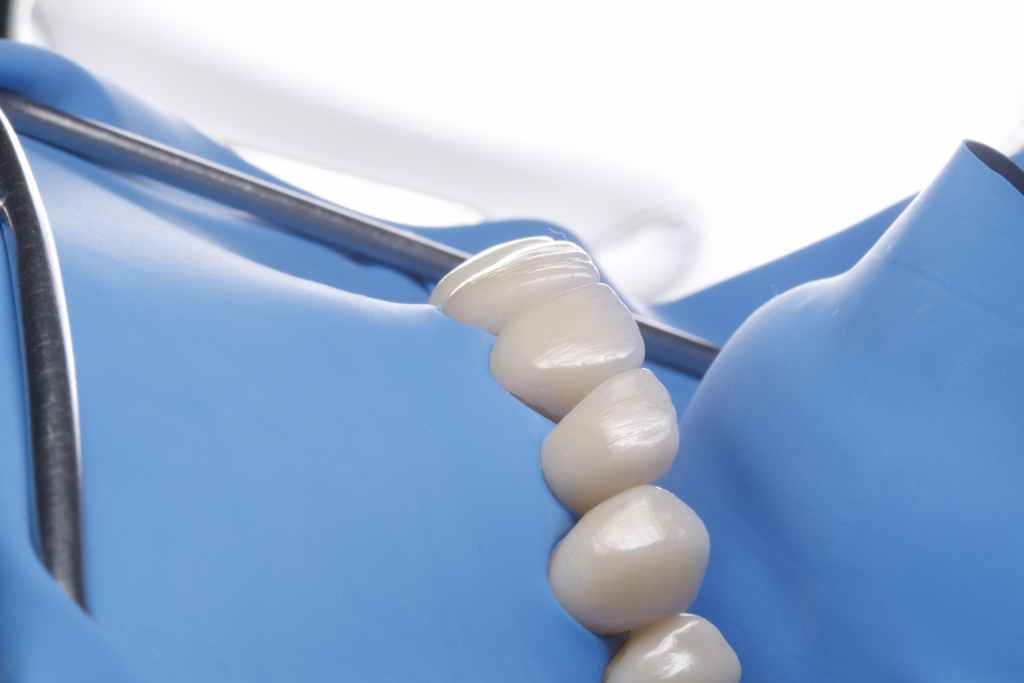
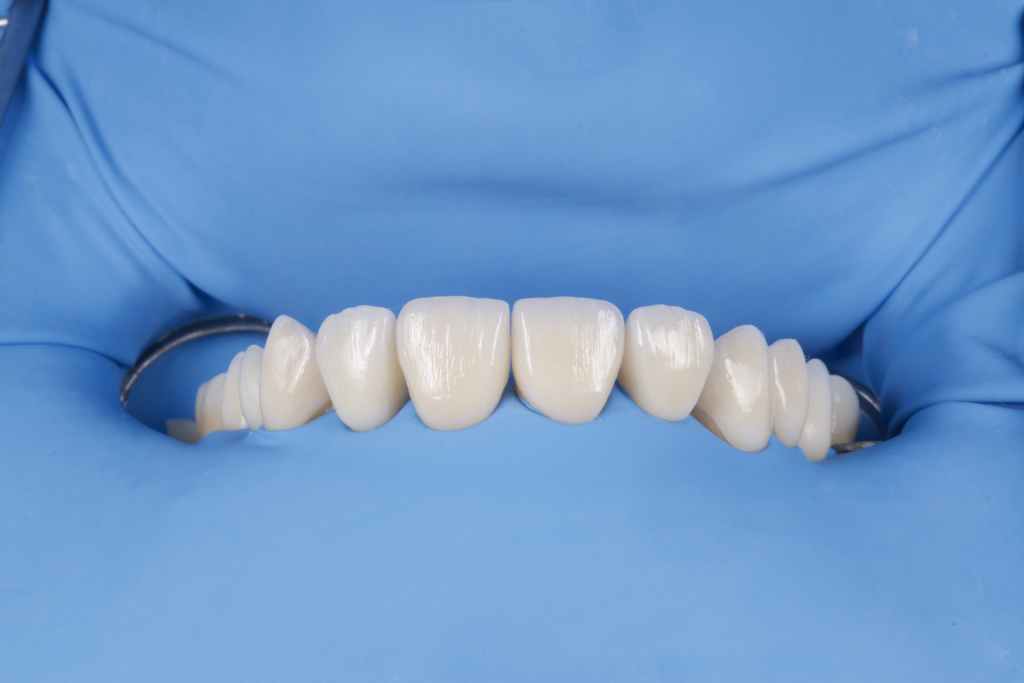
Fig 25, 26: The cement process.
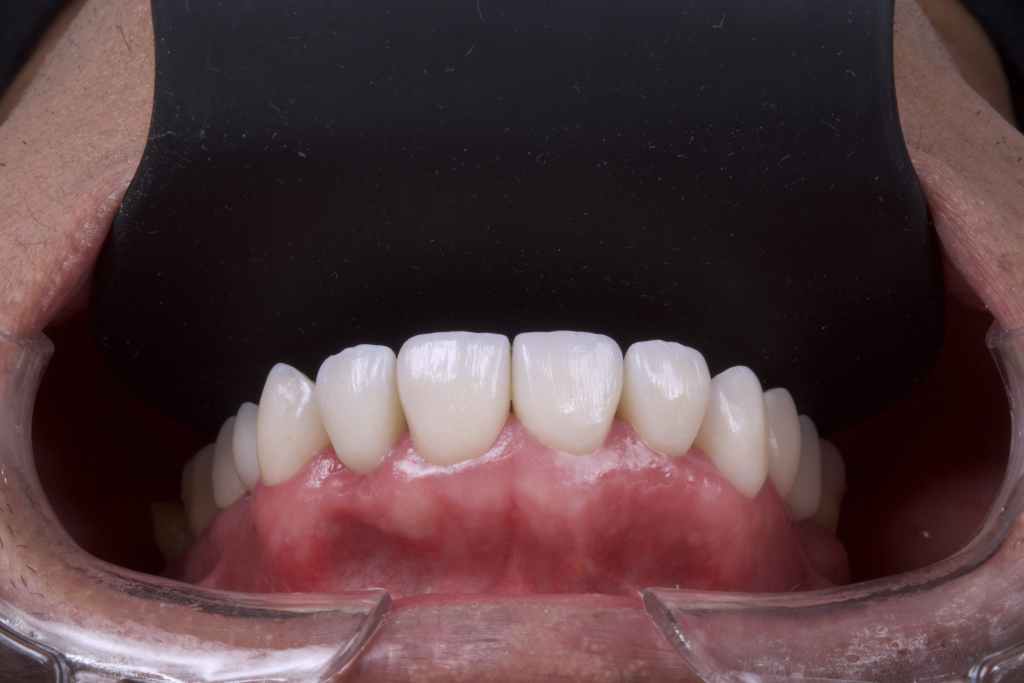
Fig 27: The intraoral photo after treatment.
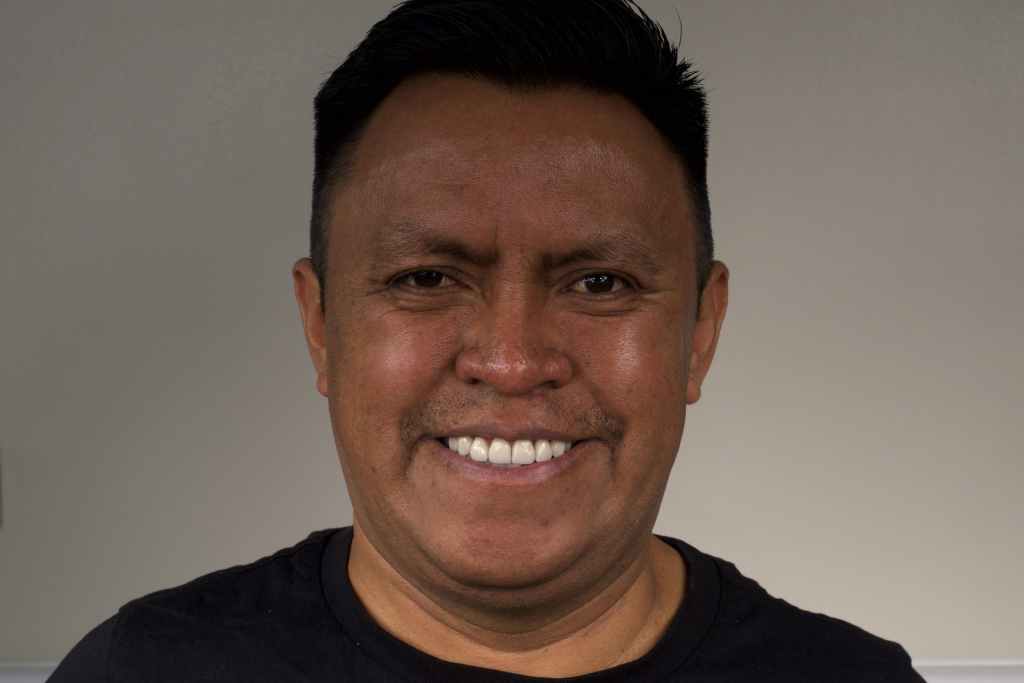
Fig 28: The face photo after treatment.
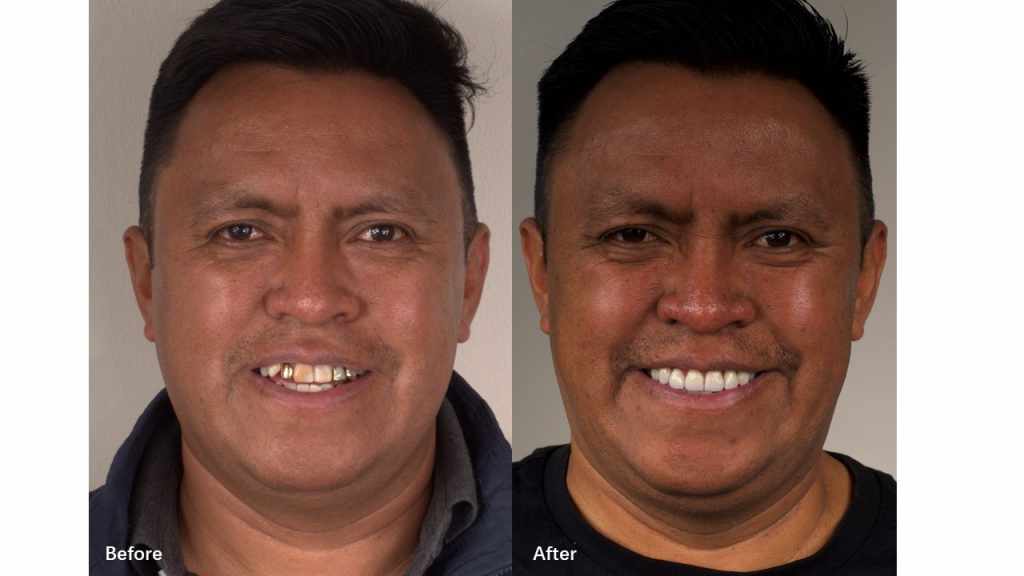
Fig 29: The comparison before and after treatment.
Comments from Dr. Luis Estuardo Pacheco
One advantage of a completely digital and reproducible workflow is that it facilitates not only clinical work but also laboratory work, integrating facial scanning with a face scanner and intraoral scanner produced by SHINING 3D, achieving exceptional and accurate results. Be better, be digital, be SHINING.
About Author
- Dr. Luis Estuardo Pacheco
- DDS., MSc.
- CEO at Dental Studio, Guatemala.
- Senior CAD/CAM consultant, Scientific Team Lab(STL), 3D Labs CAD/CAM Laboratories, Guatemala.
- Senior consultant in oral and maxillofacial radiology at 3D Xray, Guatemala.
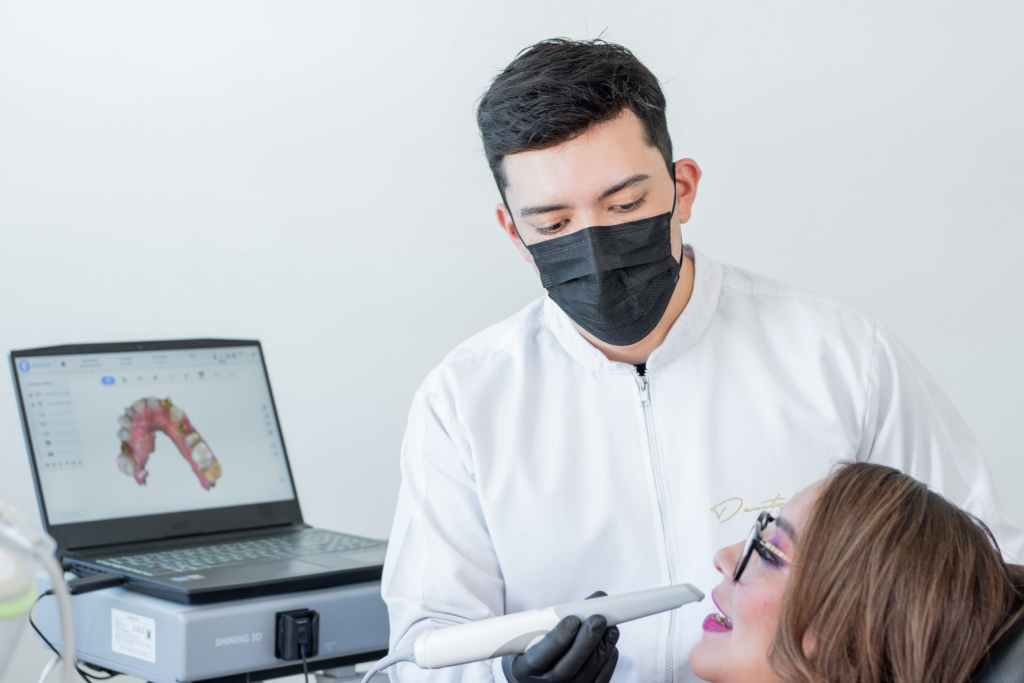
Fig 30: Dr. Luis Estuardo Pacheco