ENG
ENG


Table of Contents
Overview
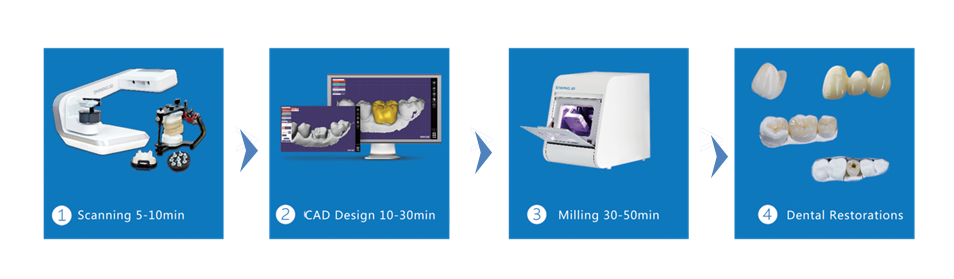
This article details the step-by-step process of Chairside Restoration with DS-EX Series 3D scanner from SHINING 3D. The case concerns two crowns.
DS-EX series 3D scanners come with a compact size and open structure and work for a wide range of applications. The DS-EX Pro in particular comes with outstanding scan speed, helping dental clients upgrade their productivity.
Steps for Chairside Restoration with DS-EX Series 3D scanner
Here are the steps to carrying out a chairside restoration with DS-EX Series 3D Scanner:
- Preparation
- Scanning
- CAD design
- Milling
- Dental restoration
1. Preparation (60 minutes)
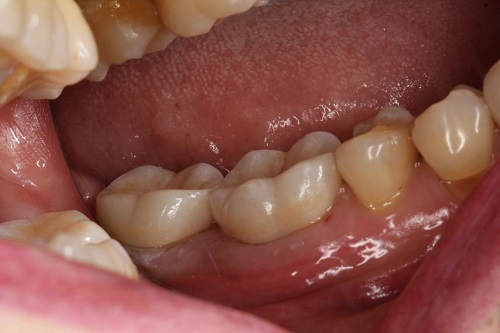
The dentist identified that the patient had two decaying molars with full anatomic zirconia crowns. They proceeded to take the impression of the patient’s teeth.

The patient had two decayed molars, full anatomic zirconia crown restoration was applied. 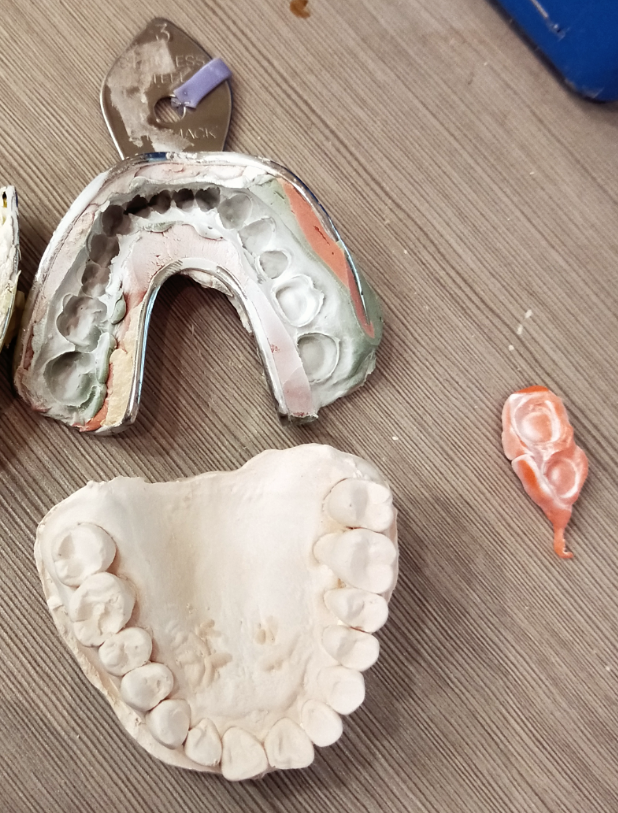
After the preparation was made, the dentist got the impression.
2. 3D scanning the impression (10 minutes)
The process for same-day chairside restoration consists of several steps.
2.1 Order Creation
First of all, it is necessary to create a new order and save it. The dentist can then click on “Scan” to jump into the scanning part of the software.
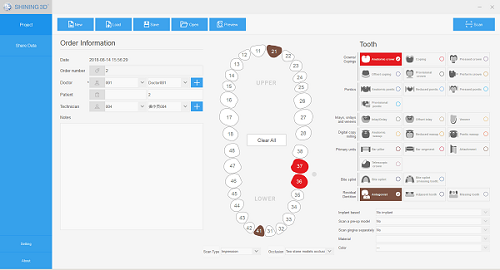
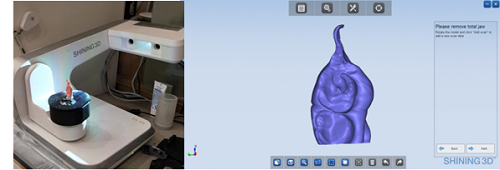
2.2 Bite Scan
We can then 3D scan the patient’s bite data. This part makes computing faster later.
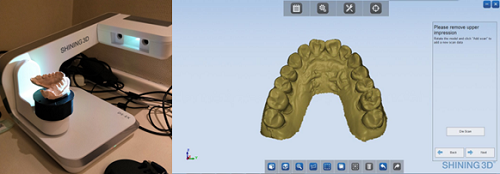
2.3 Scan Antagonist Jaw
The next step is to put the antagonist impression on the 3D scanner and launch the scan.
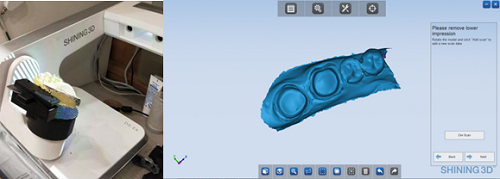
2.4 Scan Prepared Die Impression
After the bite and antagonist, we can proceed to scan the die impression.
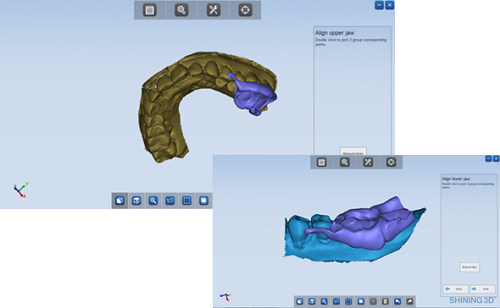
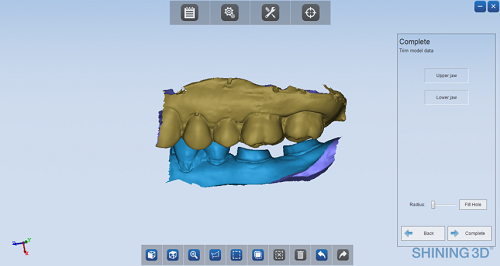
2.5 Data Alignment
One all three data sets are ready, it’s possible to align them.
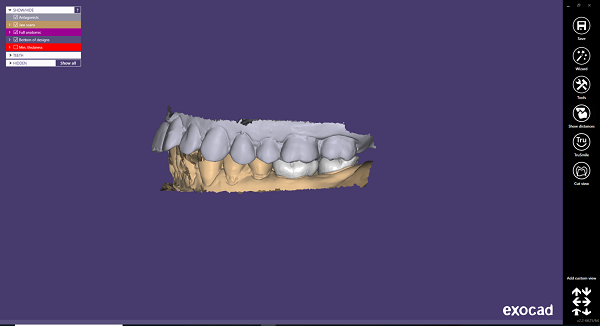
3. CAD Design (15 minutes)
The scan data is imported directly into exocad design software, where the technician can design the inlays.
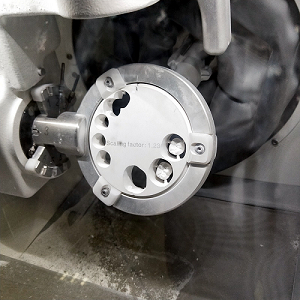
4. Data Planning & Milling (35 minutes)
Then, the technician can export the design data directly into CAM software so that the mill can create the zirconia crowns.
5. Post-processing (120 minutes)
Post-processing is almost the last part of chairside restoration. It involves sintering the ceramic and enameling the prostheses, plus making any needed adjustments. Then, dentists can try the prostheses on the plaster model of the patient’s impressions.
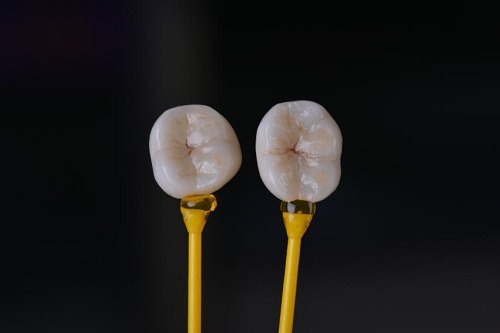
Sintering – Enamelling – Adjustment 
Try on the plaster model
6. In-mouth Try-out
Once the tooth fits perfectly on the plaster model, it’s ready to be positioned in the patient’s mouth.